


New technologies are being brought to life every day, and blockchain technology is one of the emerging ones currently being utilized. In my last article, we learned how to set up Solana Pay’s Pos System to accept crypto payments on Devnet.
Now we’re going to learn how to add support for a stablecoin, quickly set up the Pos system on mainnet, and add it as a payment method to our website.
It’s 2022, and crypto payment is becoming more mainstream. How cool would it be to quickly get a crypto donation or “coffee tip” from an anonymous guest on your website? Let’s find out.
Prerequisites
To follow and understand this tutorial, you will need the following:
- A text editor or IDE (preferably Vscode)
- Node.js installed on your machine
- Minimal knowledge of HTML
- A preview of my last article on setting up Solana’s Pos system on Devnet
Moving from Devnet to Mainnet
As explained in my last article, the devnet server is for local development and is hosted on your local machine. It enables testing and experimenting without affecting real assets, but the mainnet is used for production and will affect real assets.
Here’s how you can easily move the Solana Pos system from the Devnet server to the Mainnet server
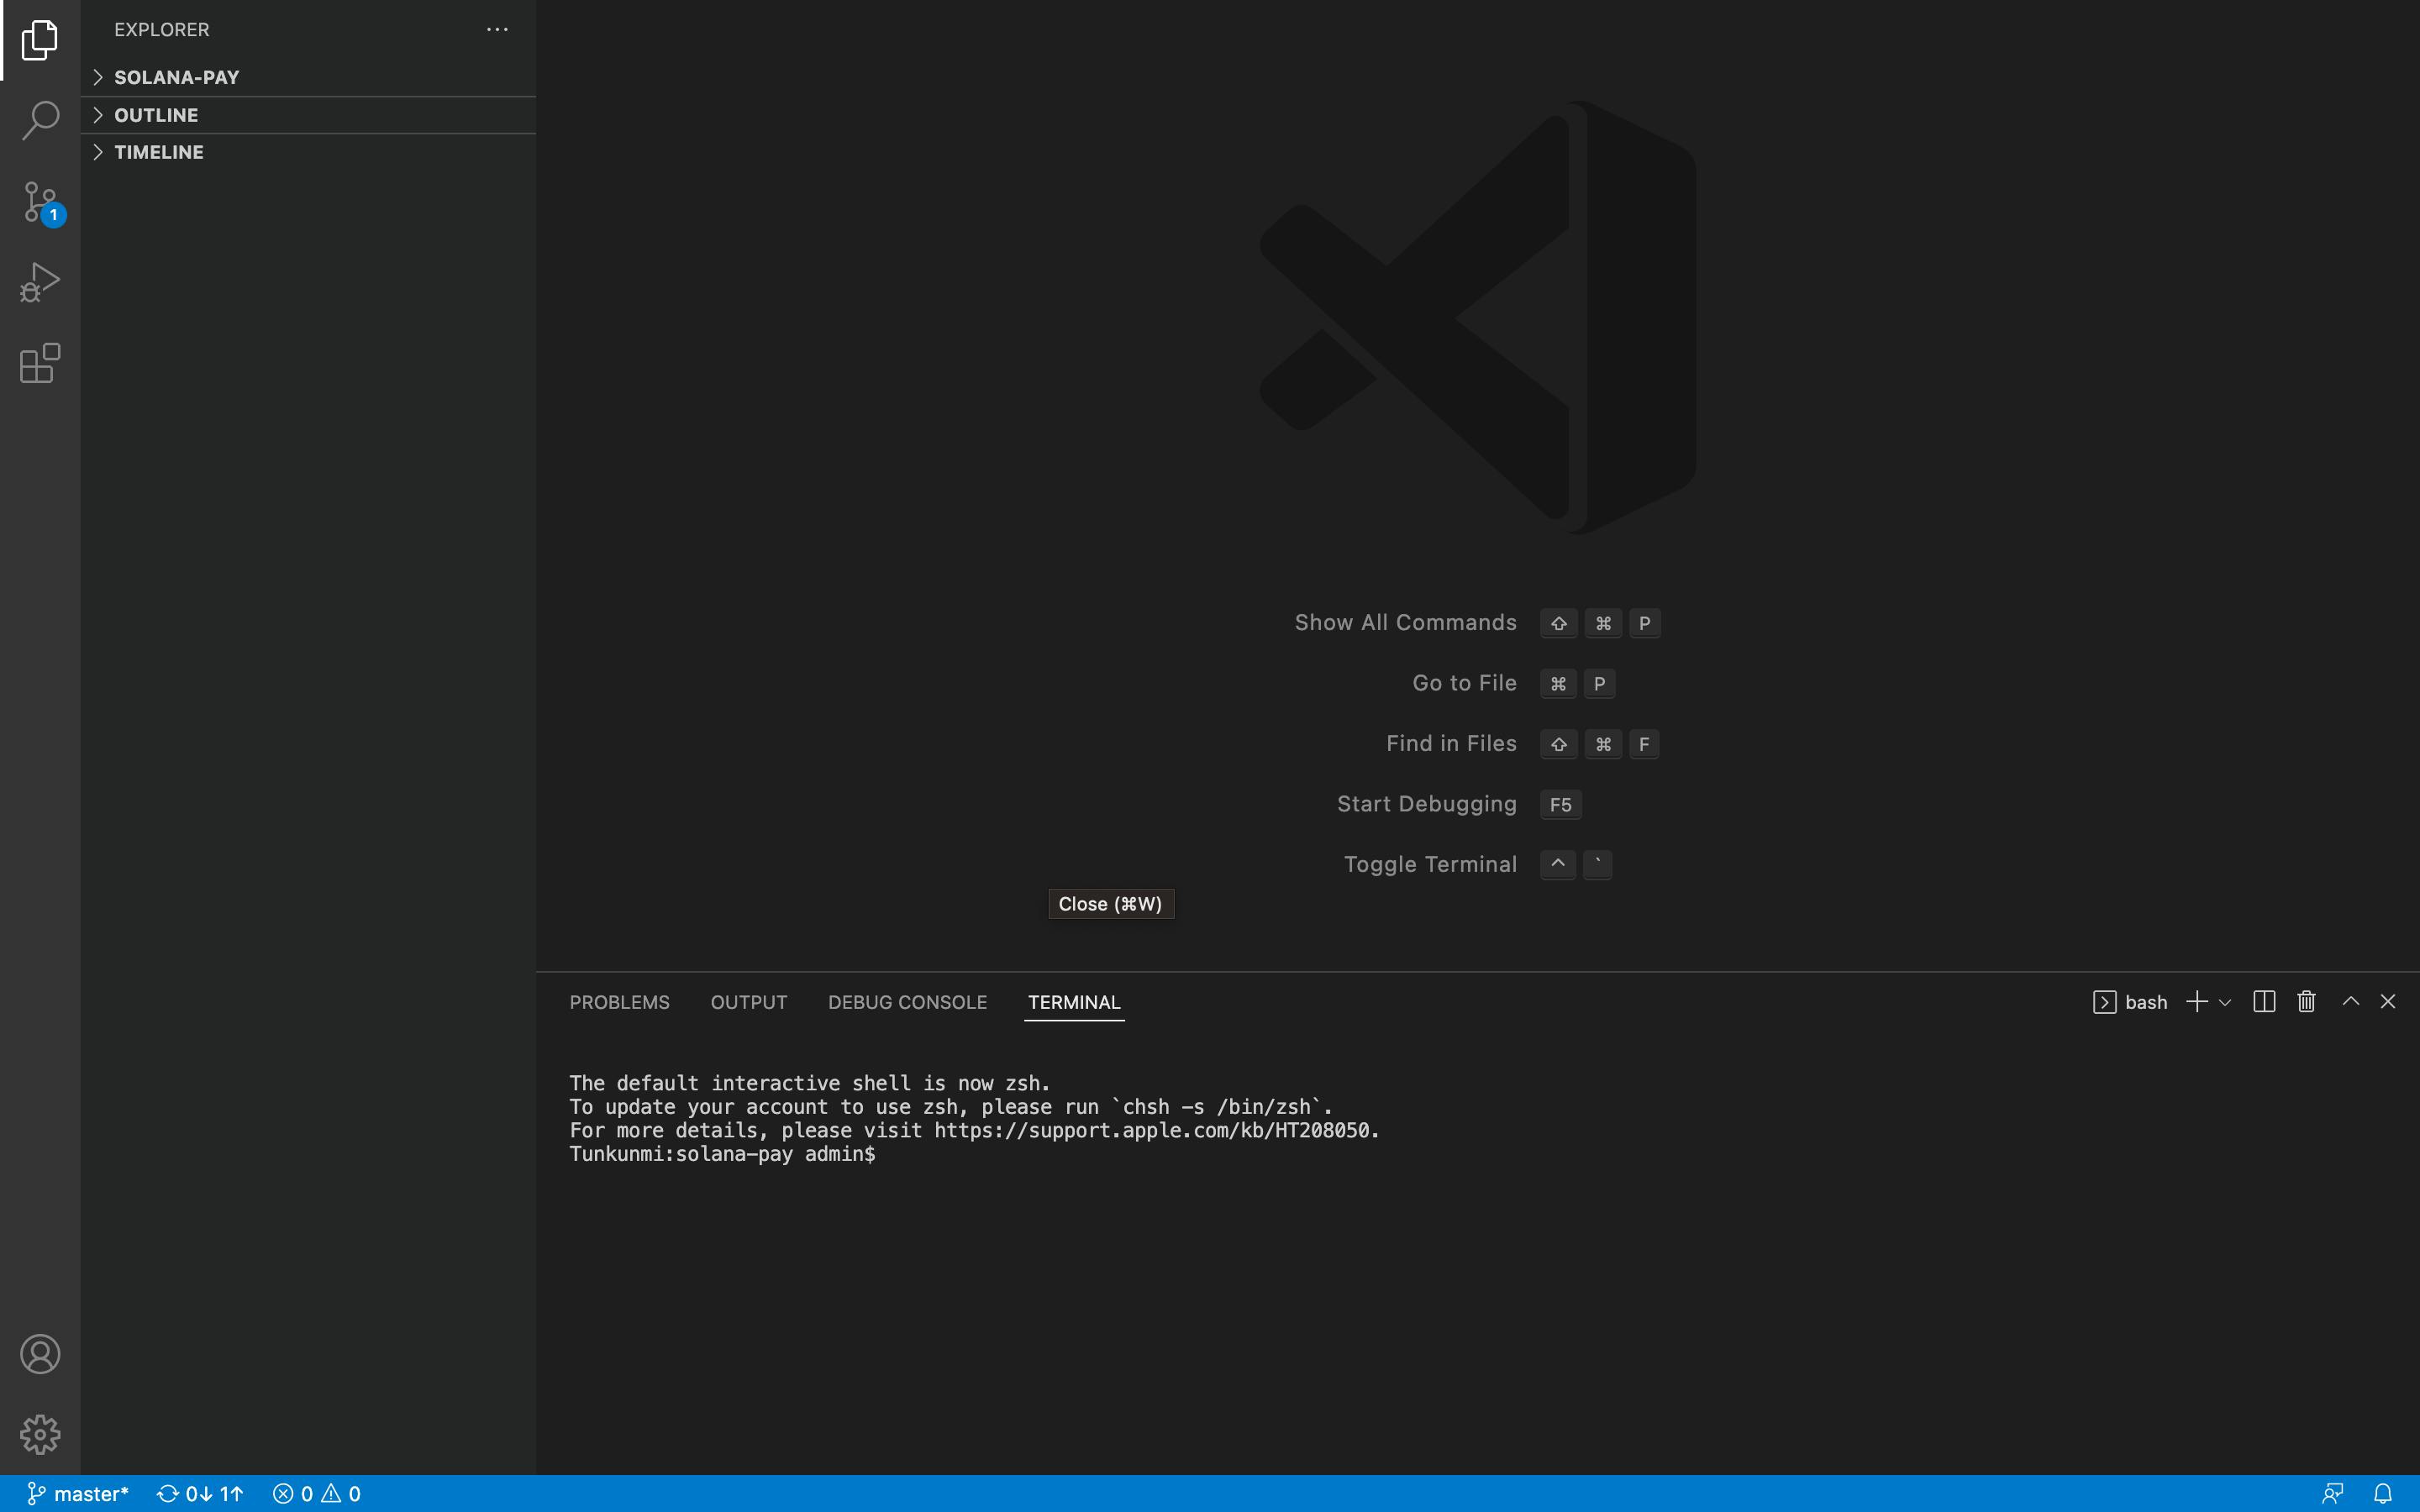
Step 1: Clone the Solana pay repo and open it up in vscode
Clone the original Solana pay repository and open up the project in vscode
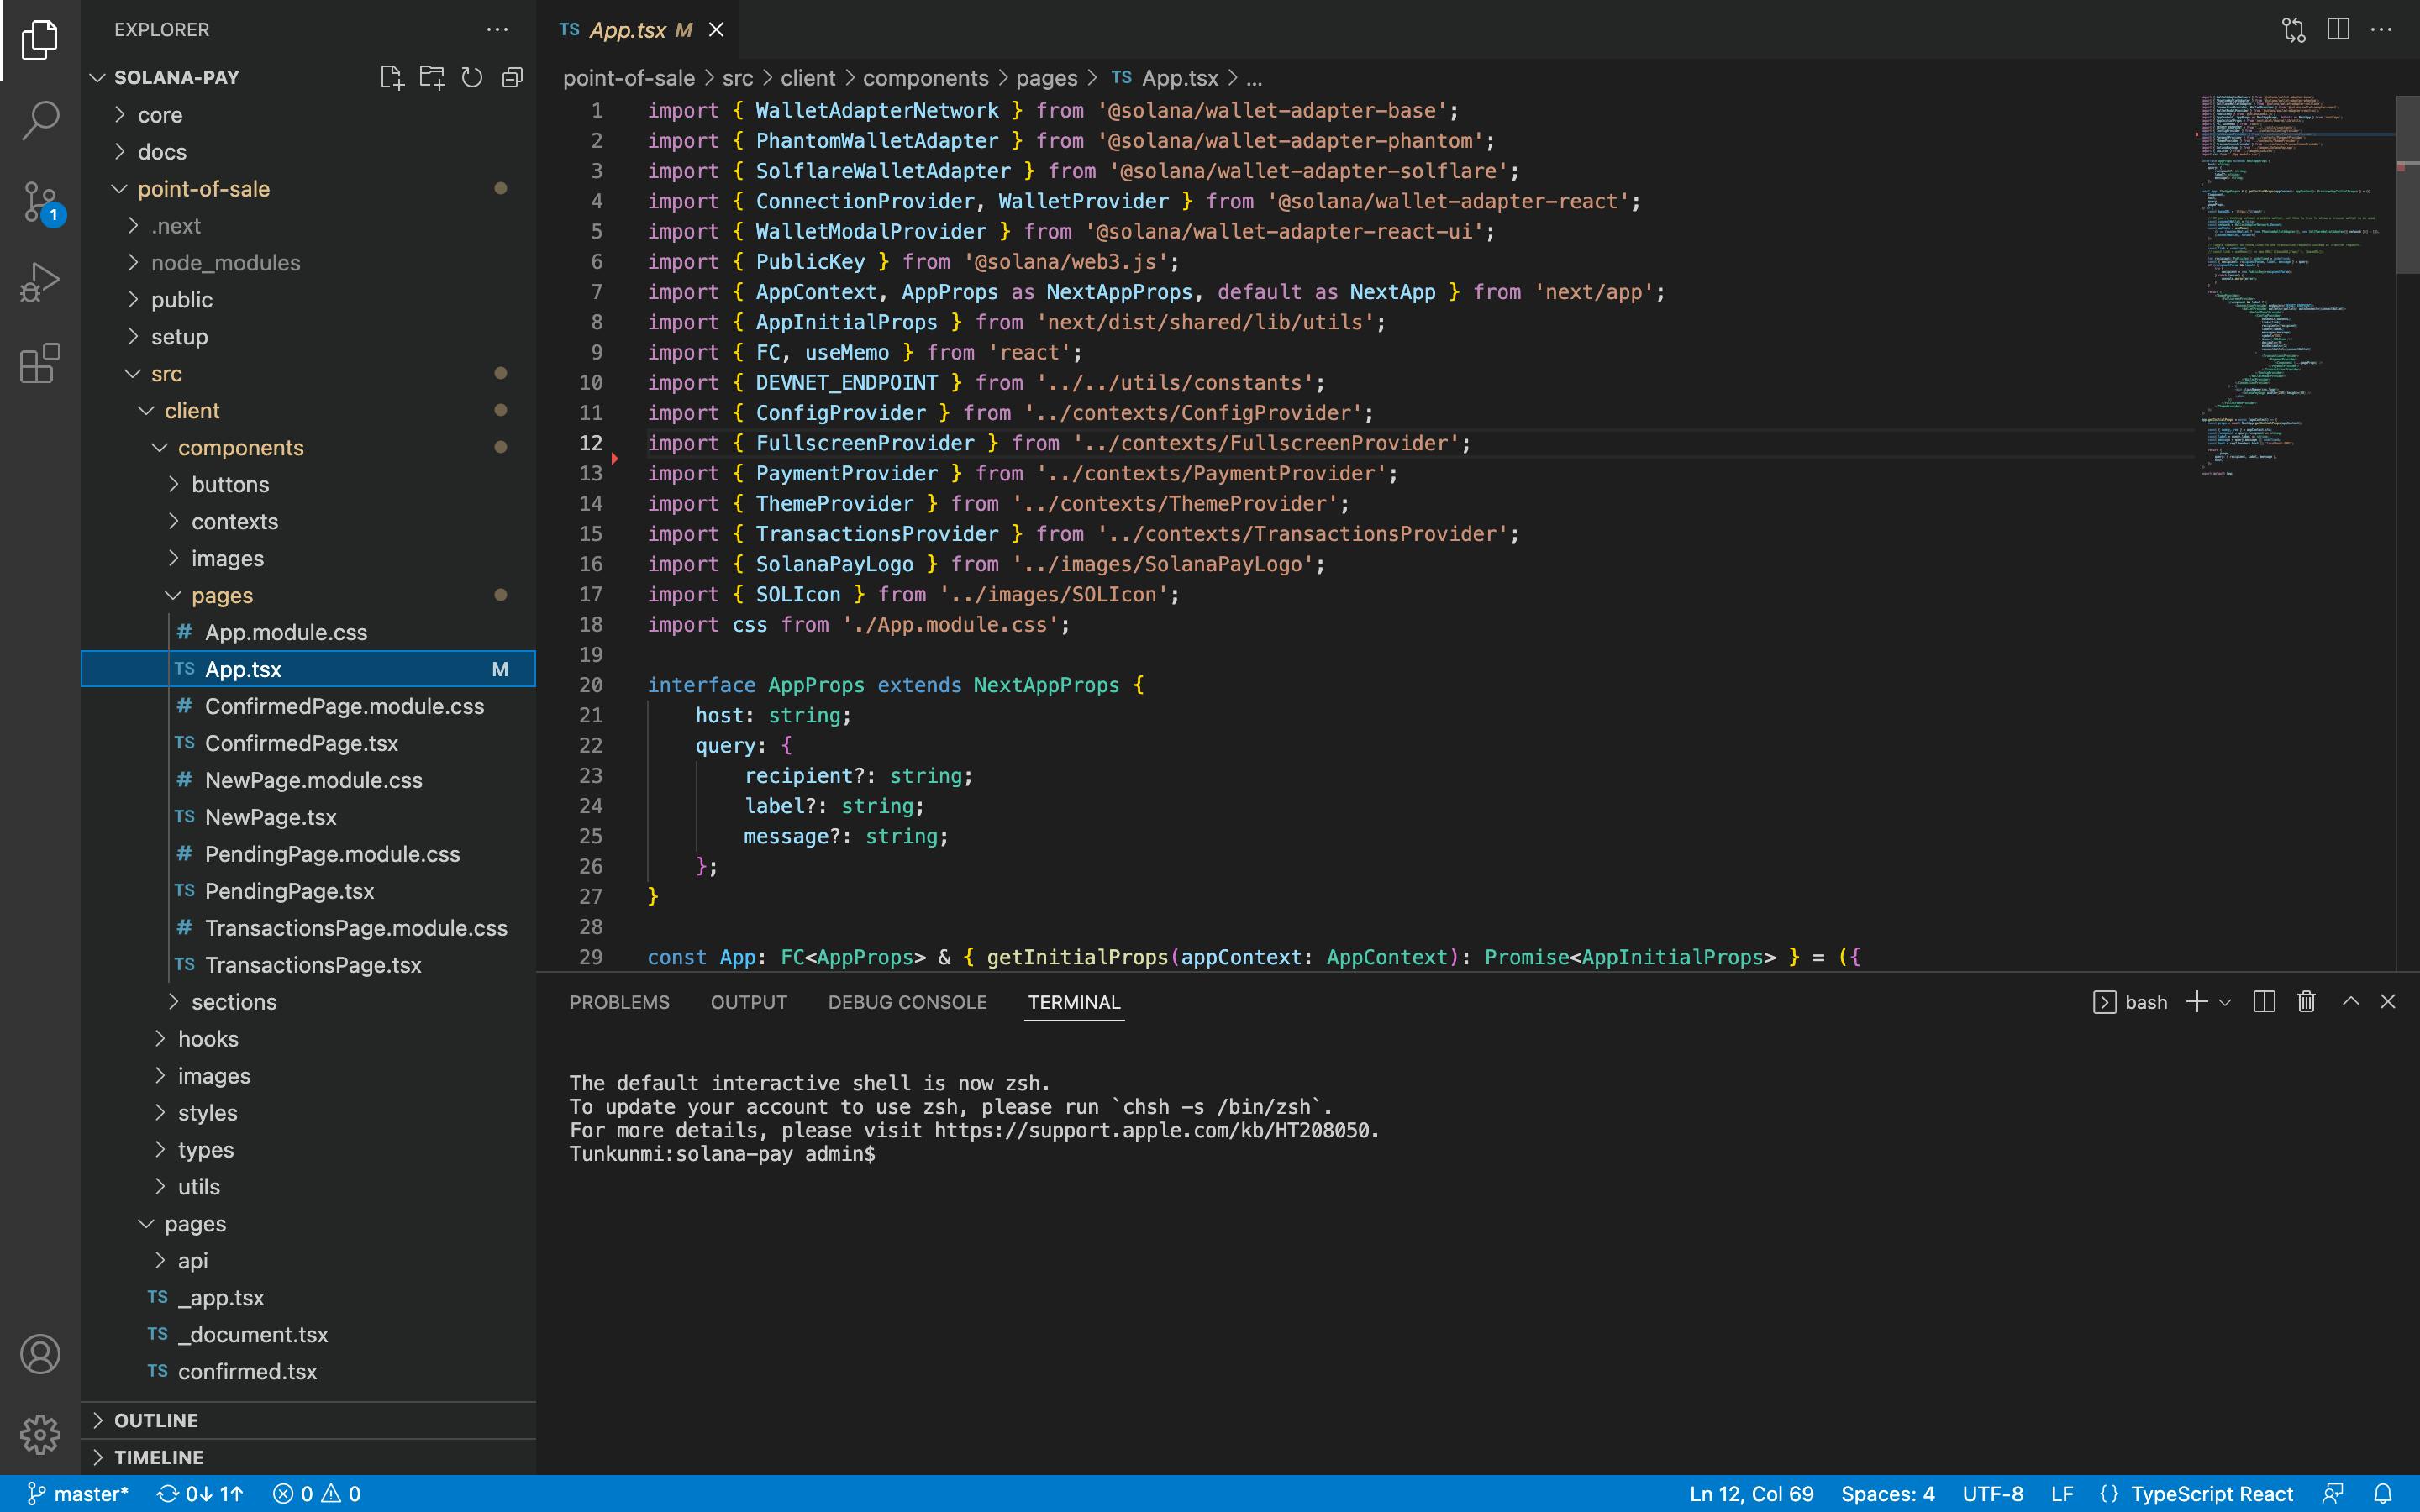
Step 2: Locate the file containing our main react component
You can find this in point-of-sale/src/client/components/pages/app.tsx file
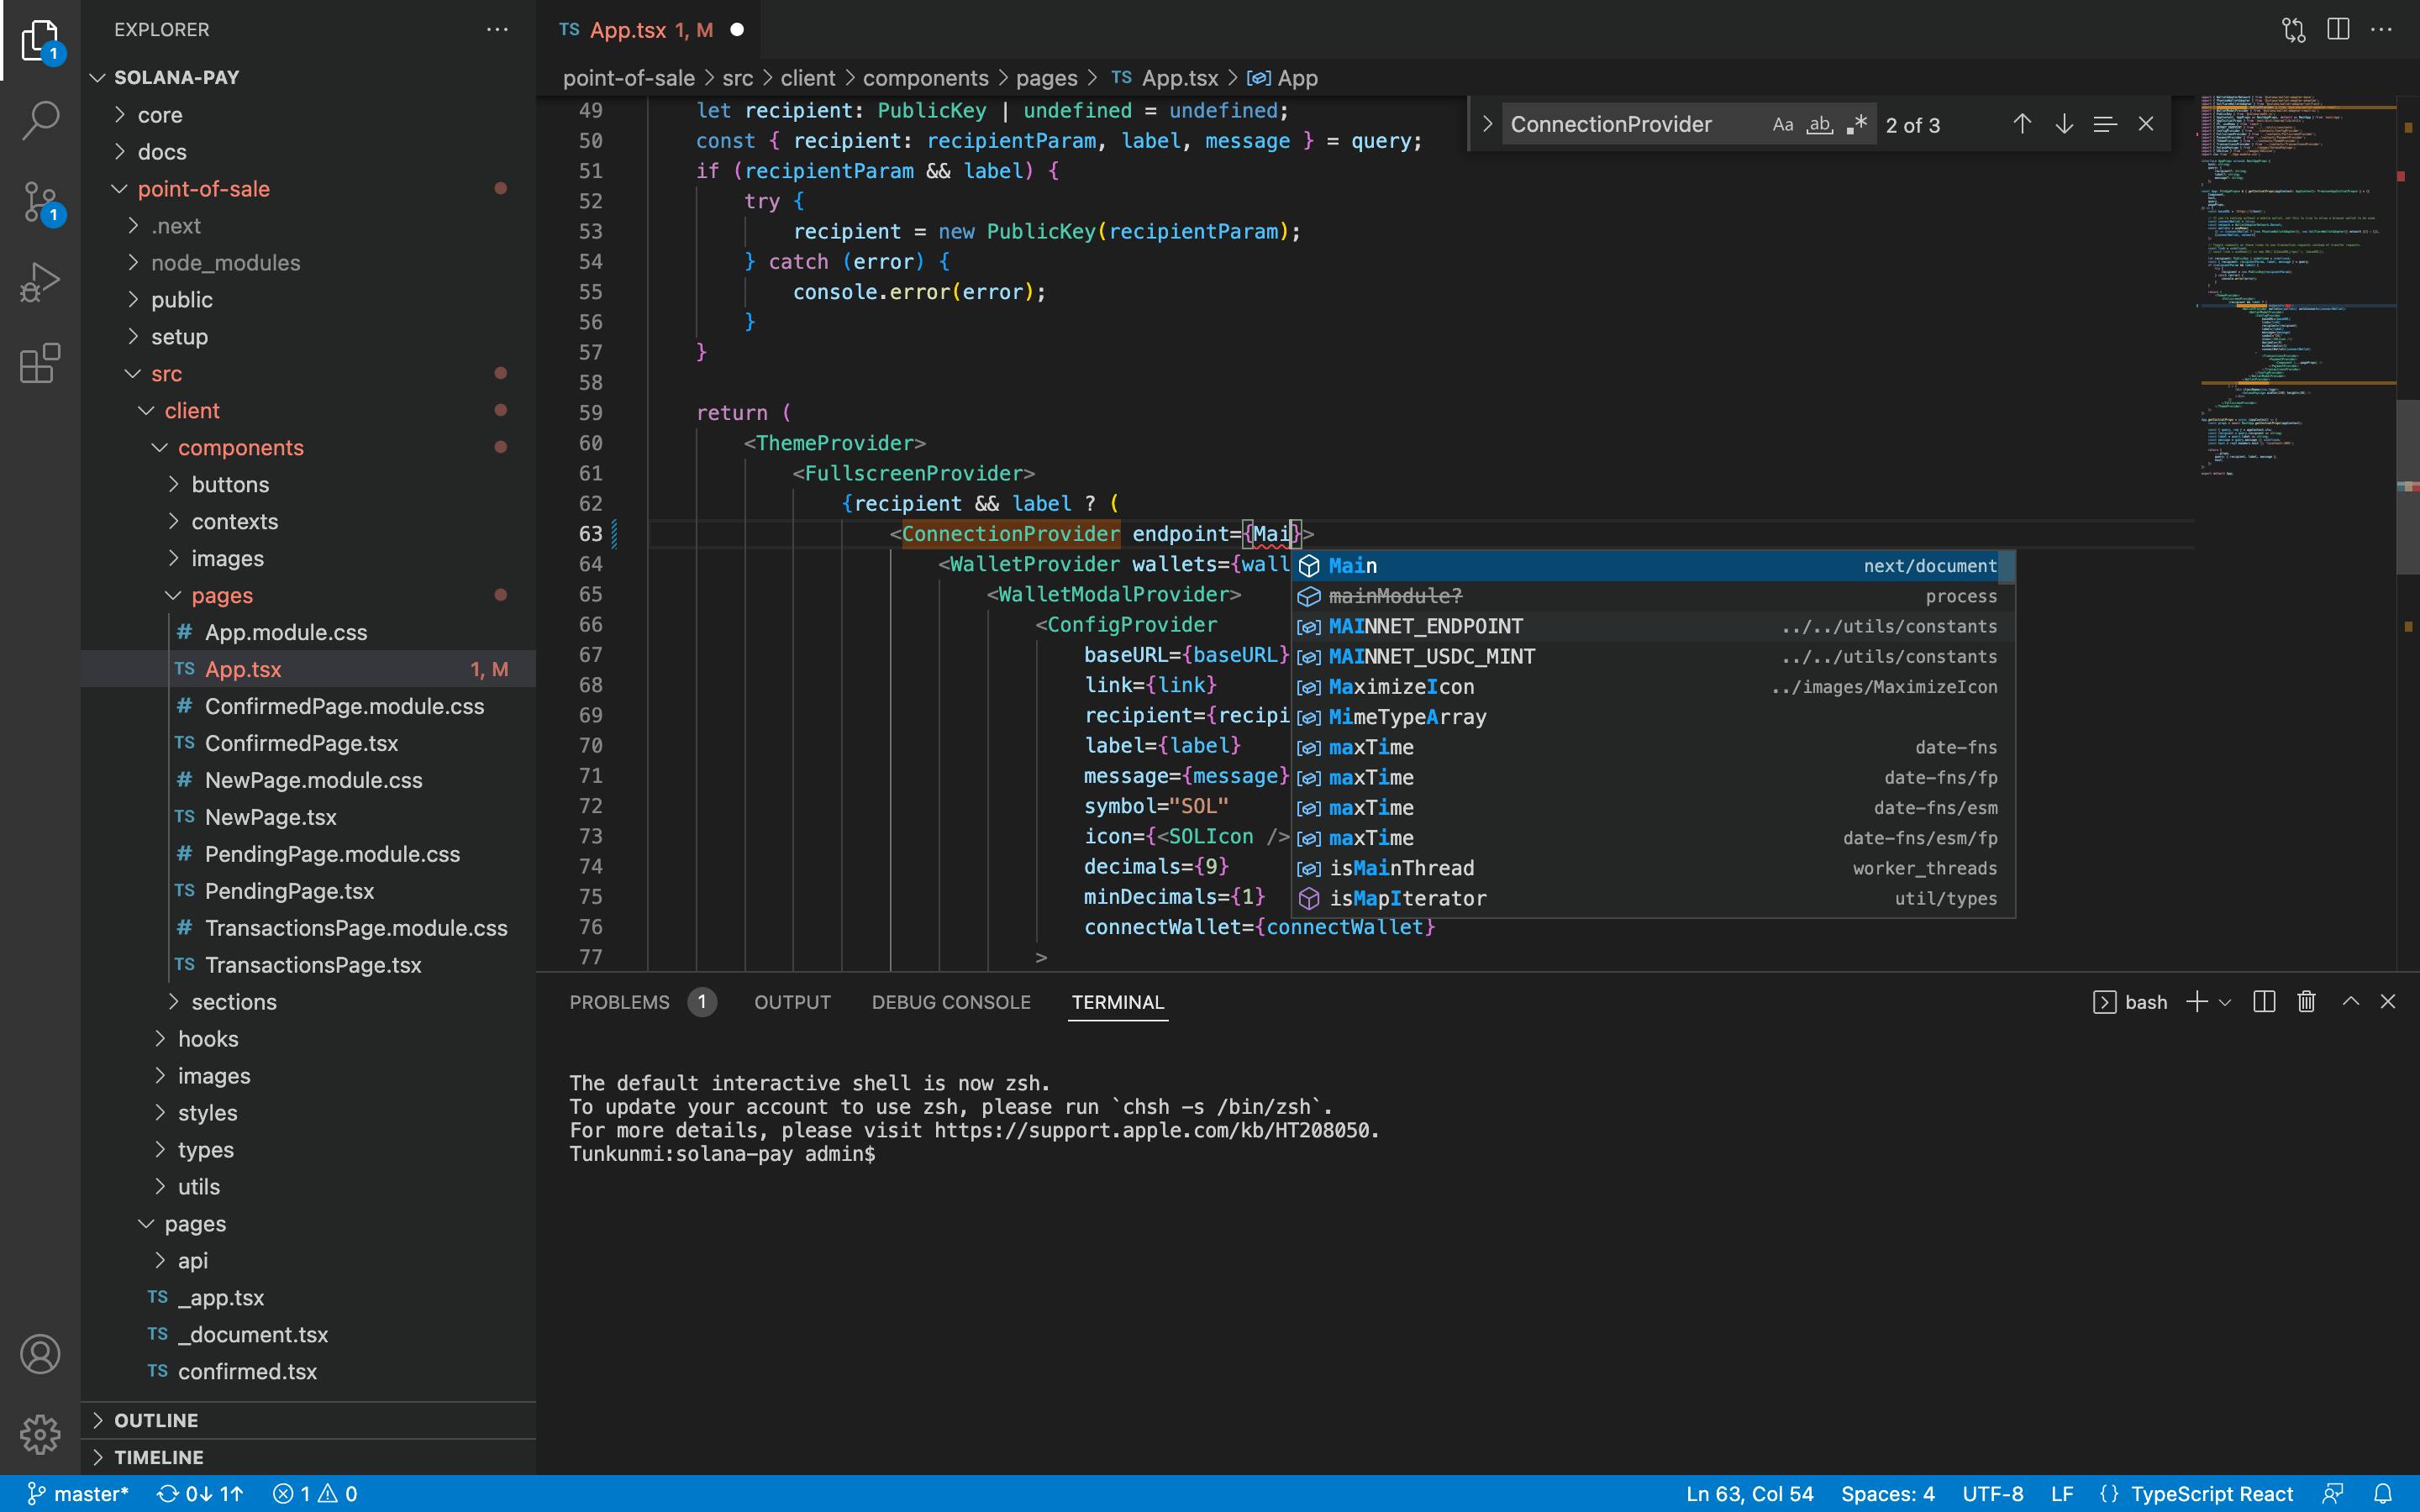
Step 3: Navigate to the ConnectionProvider endpoint
This can be done by searching for ConnectionProvider in the codebase. You can do this by hitting “cmd+f” to bring up a search bar in vscode
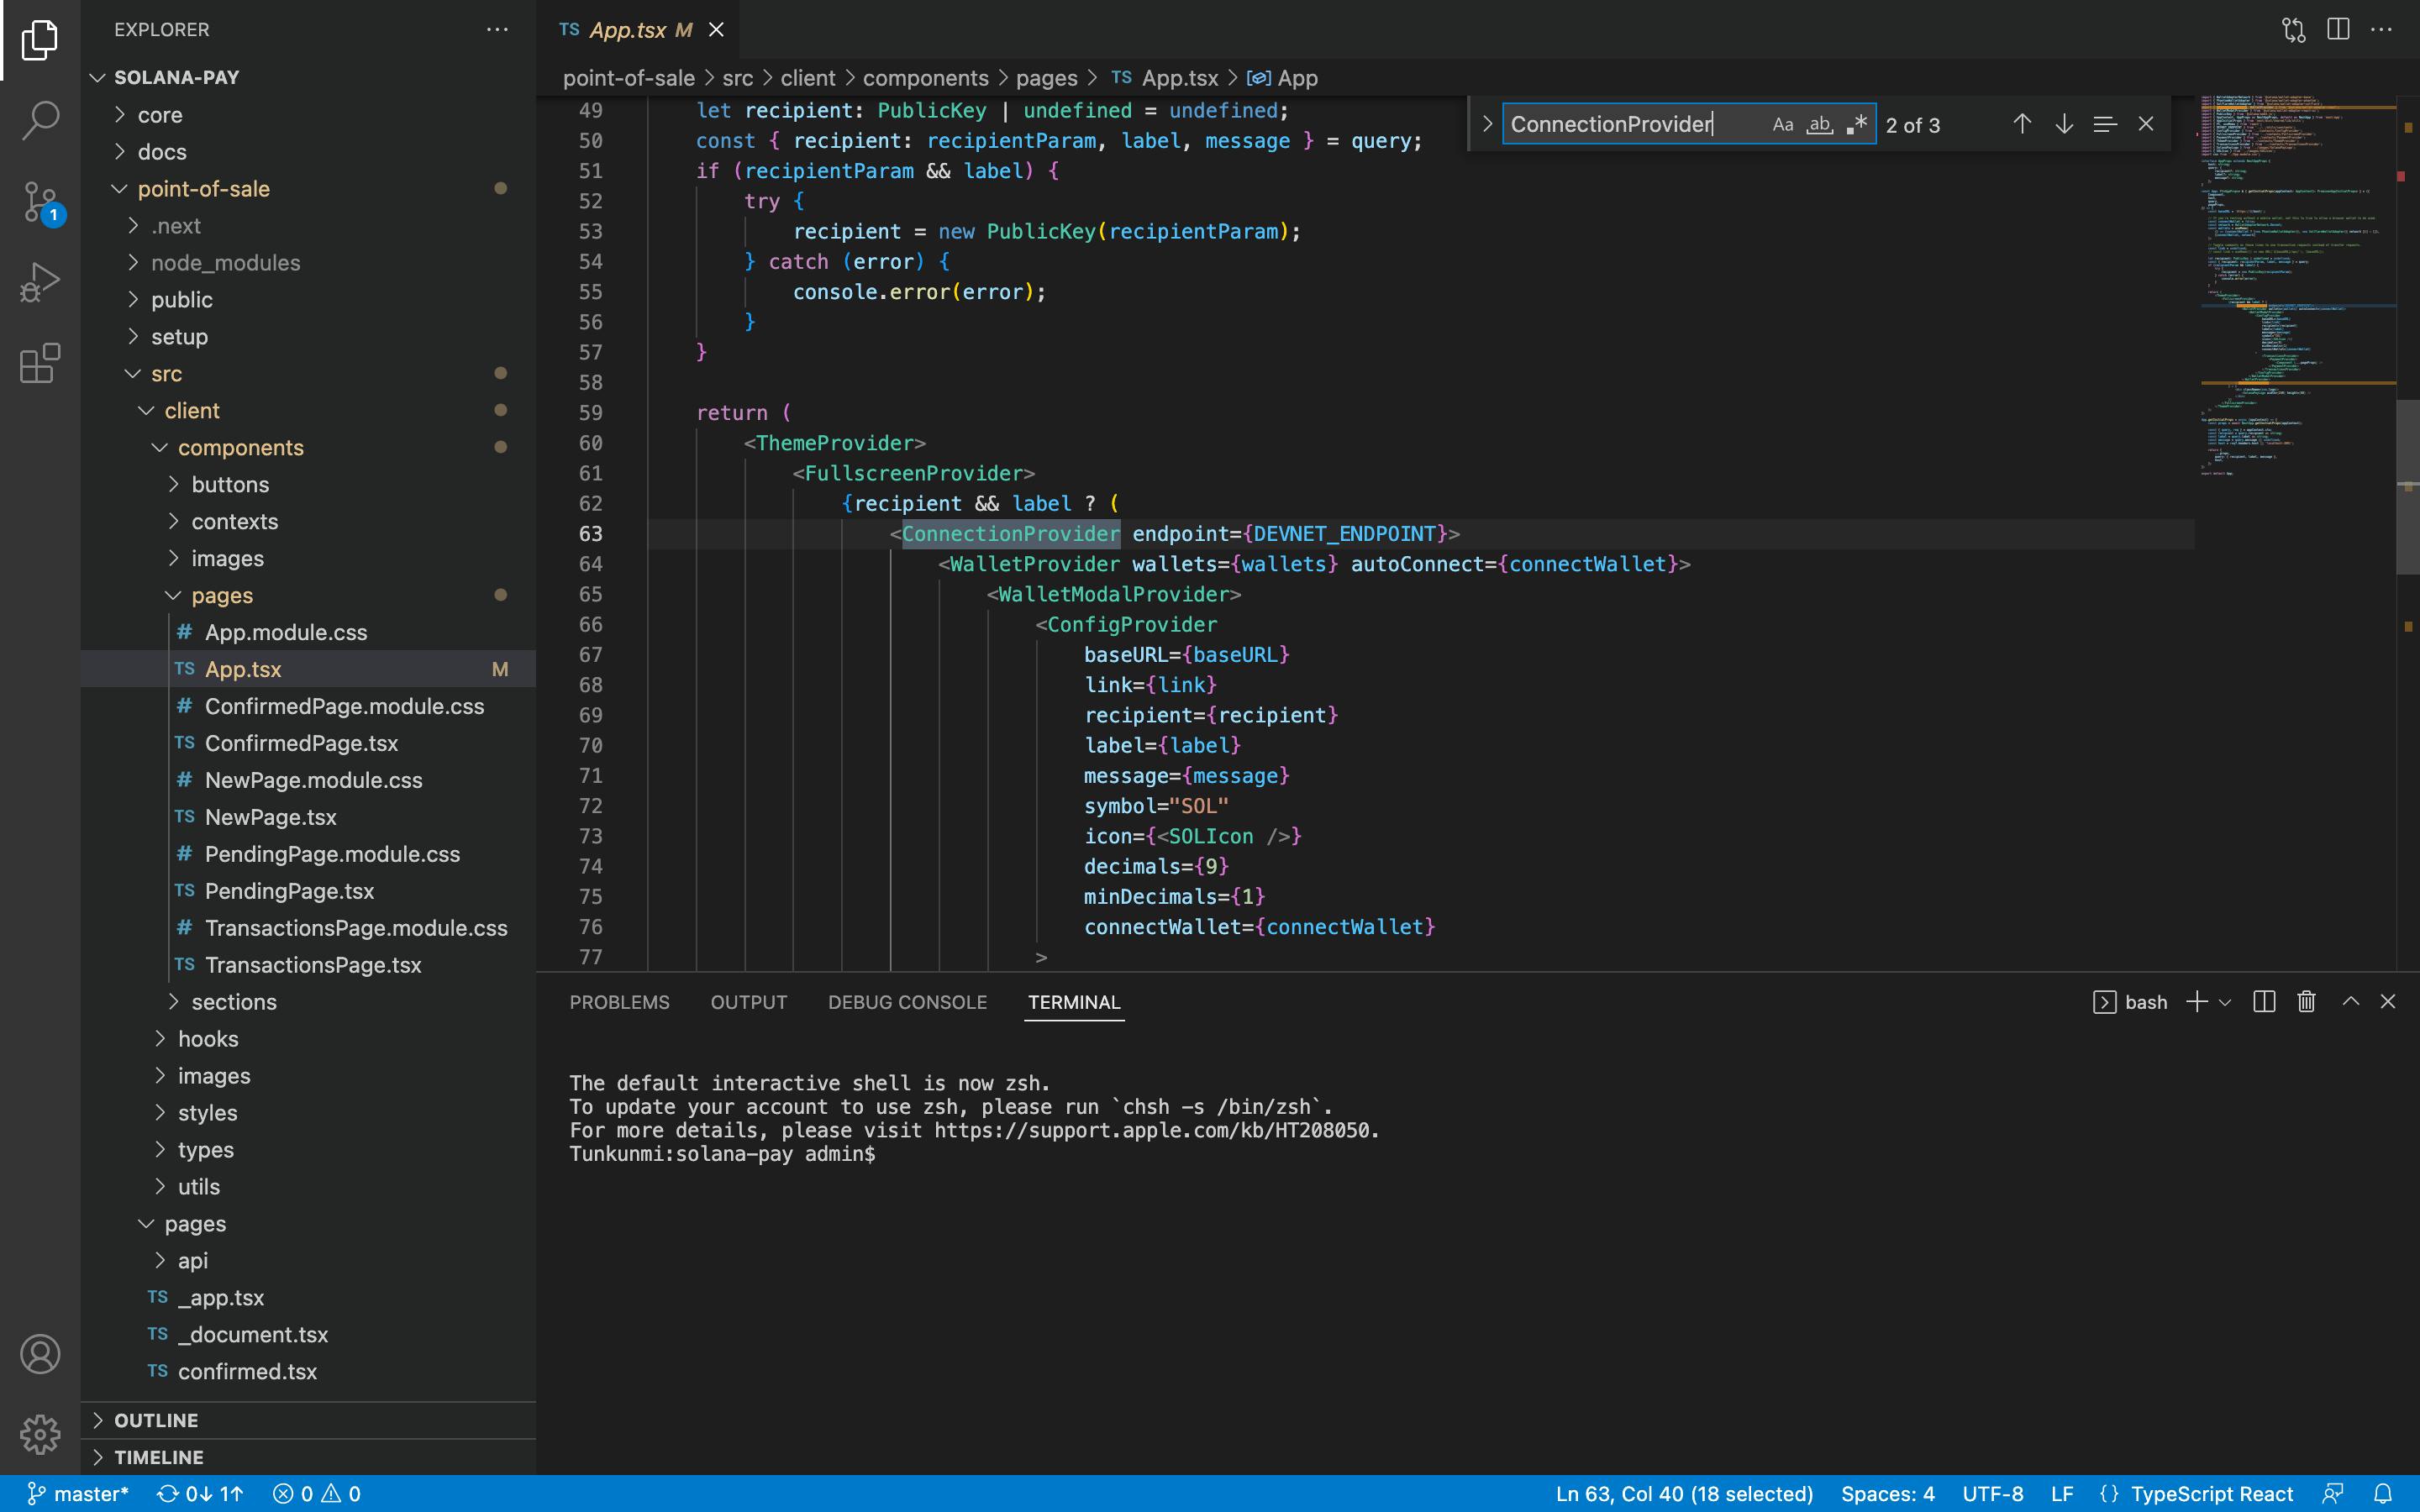
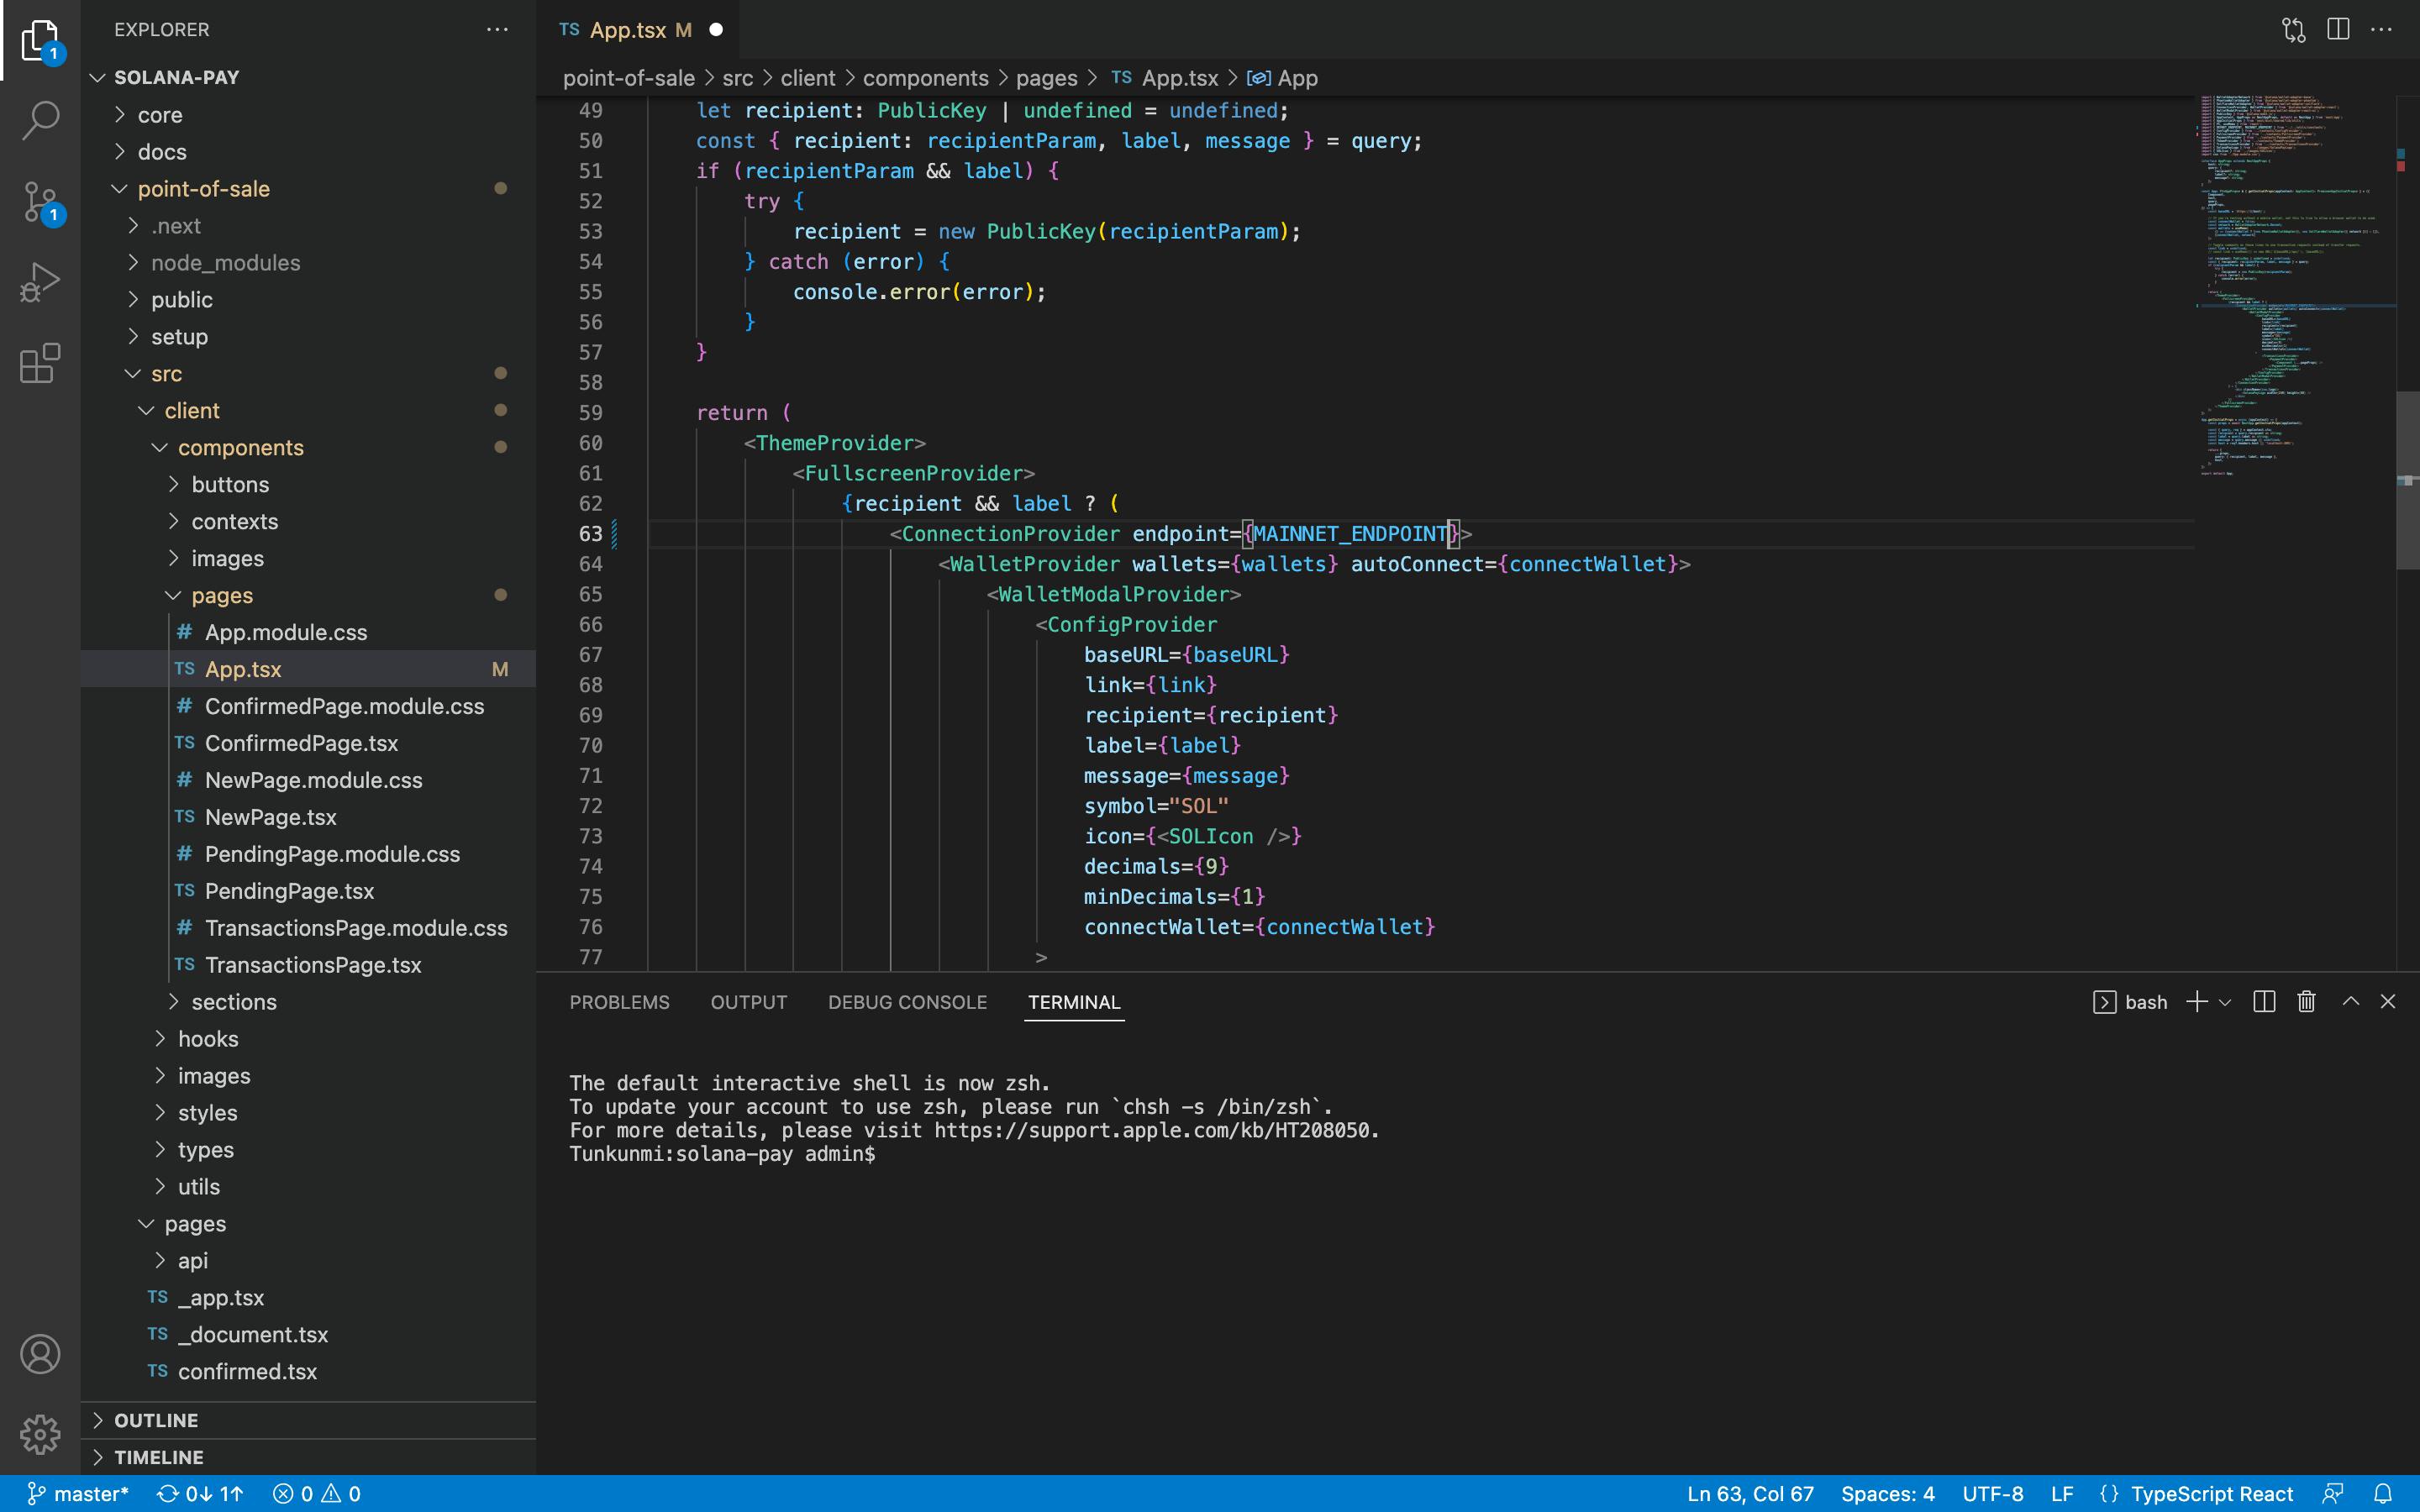
Step 4: Edit the values from Devnet to Mainnet
Once you have found the <ConnectionProvider endpoint>, edit it from DEVNET_ENDPOINT to MAINNET_ENDPOINT (it’ll probably show up as a suggestion on vscode depending on your settings), and voila, you’ve successfully ported from devnet to mainnet.
Switching token support from $SOL to $USDC stablecoin
Solana Pay supports Solana’s native asset ($SOL) and the stablecoin $USDC issued as a native SPL token on the Solana blockchain. Although you can currently only enable one at a time, adding a stablecoin gives developers and merchants the ability to add a token pegged to the US dollar to combat the volatility and fluctuations in price that they would typically get on other crypto assets.
Here’s how we can easily add support for $USDC:
Step 1: Locate the file containing our main react component
In same file structure point-of-sale/src/client/components/pages/app.tsx, navigate to the <ConfigProvider> by searching for ConfigProvider in the codebase
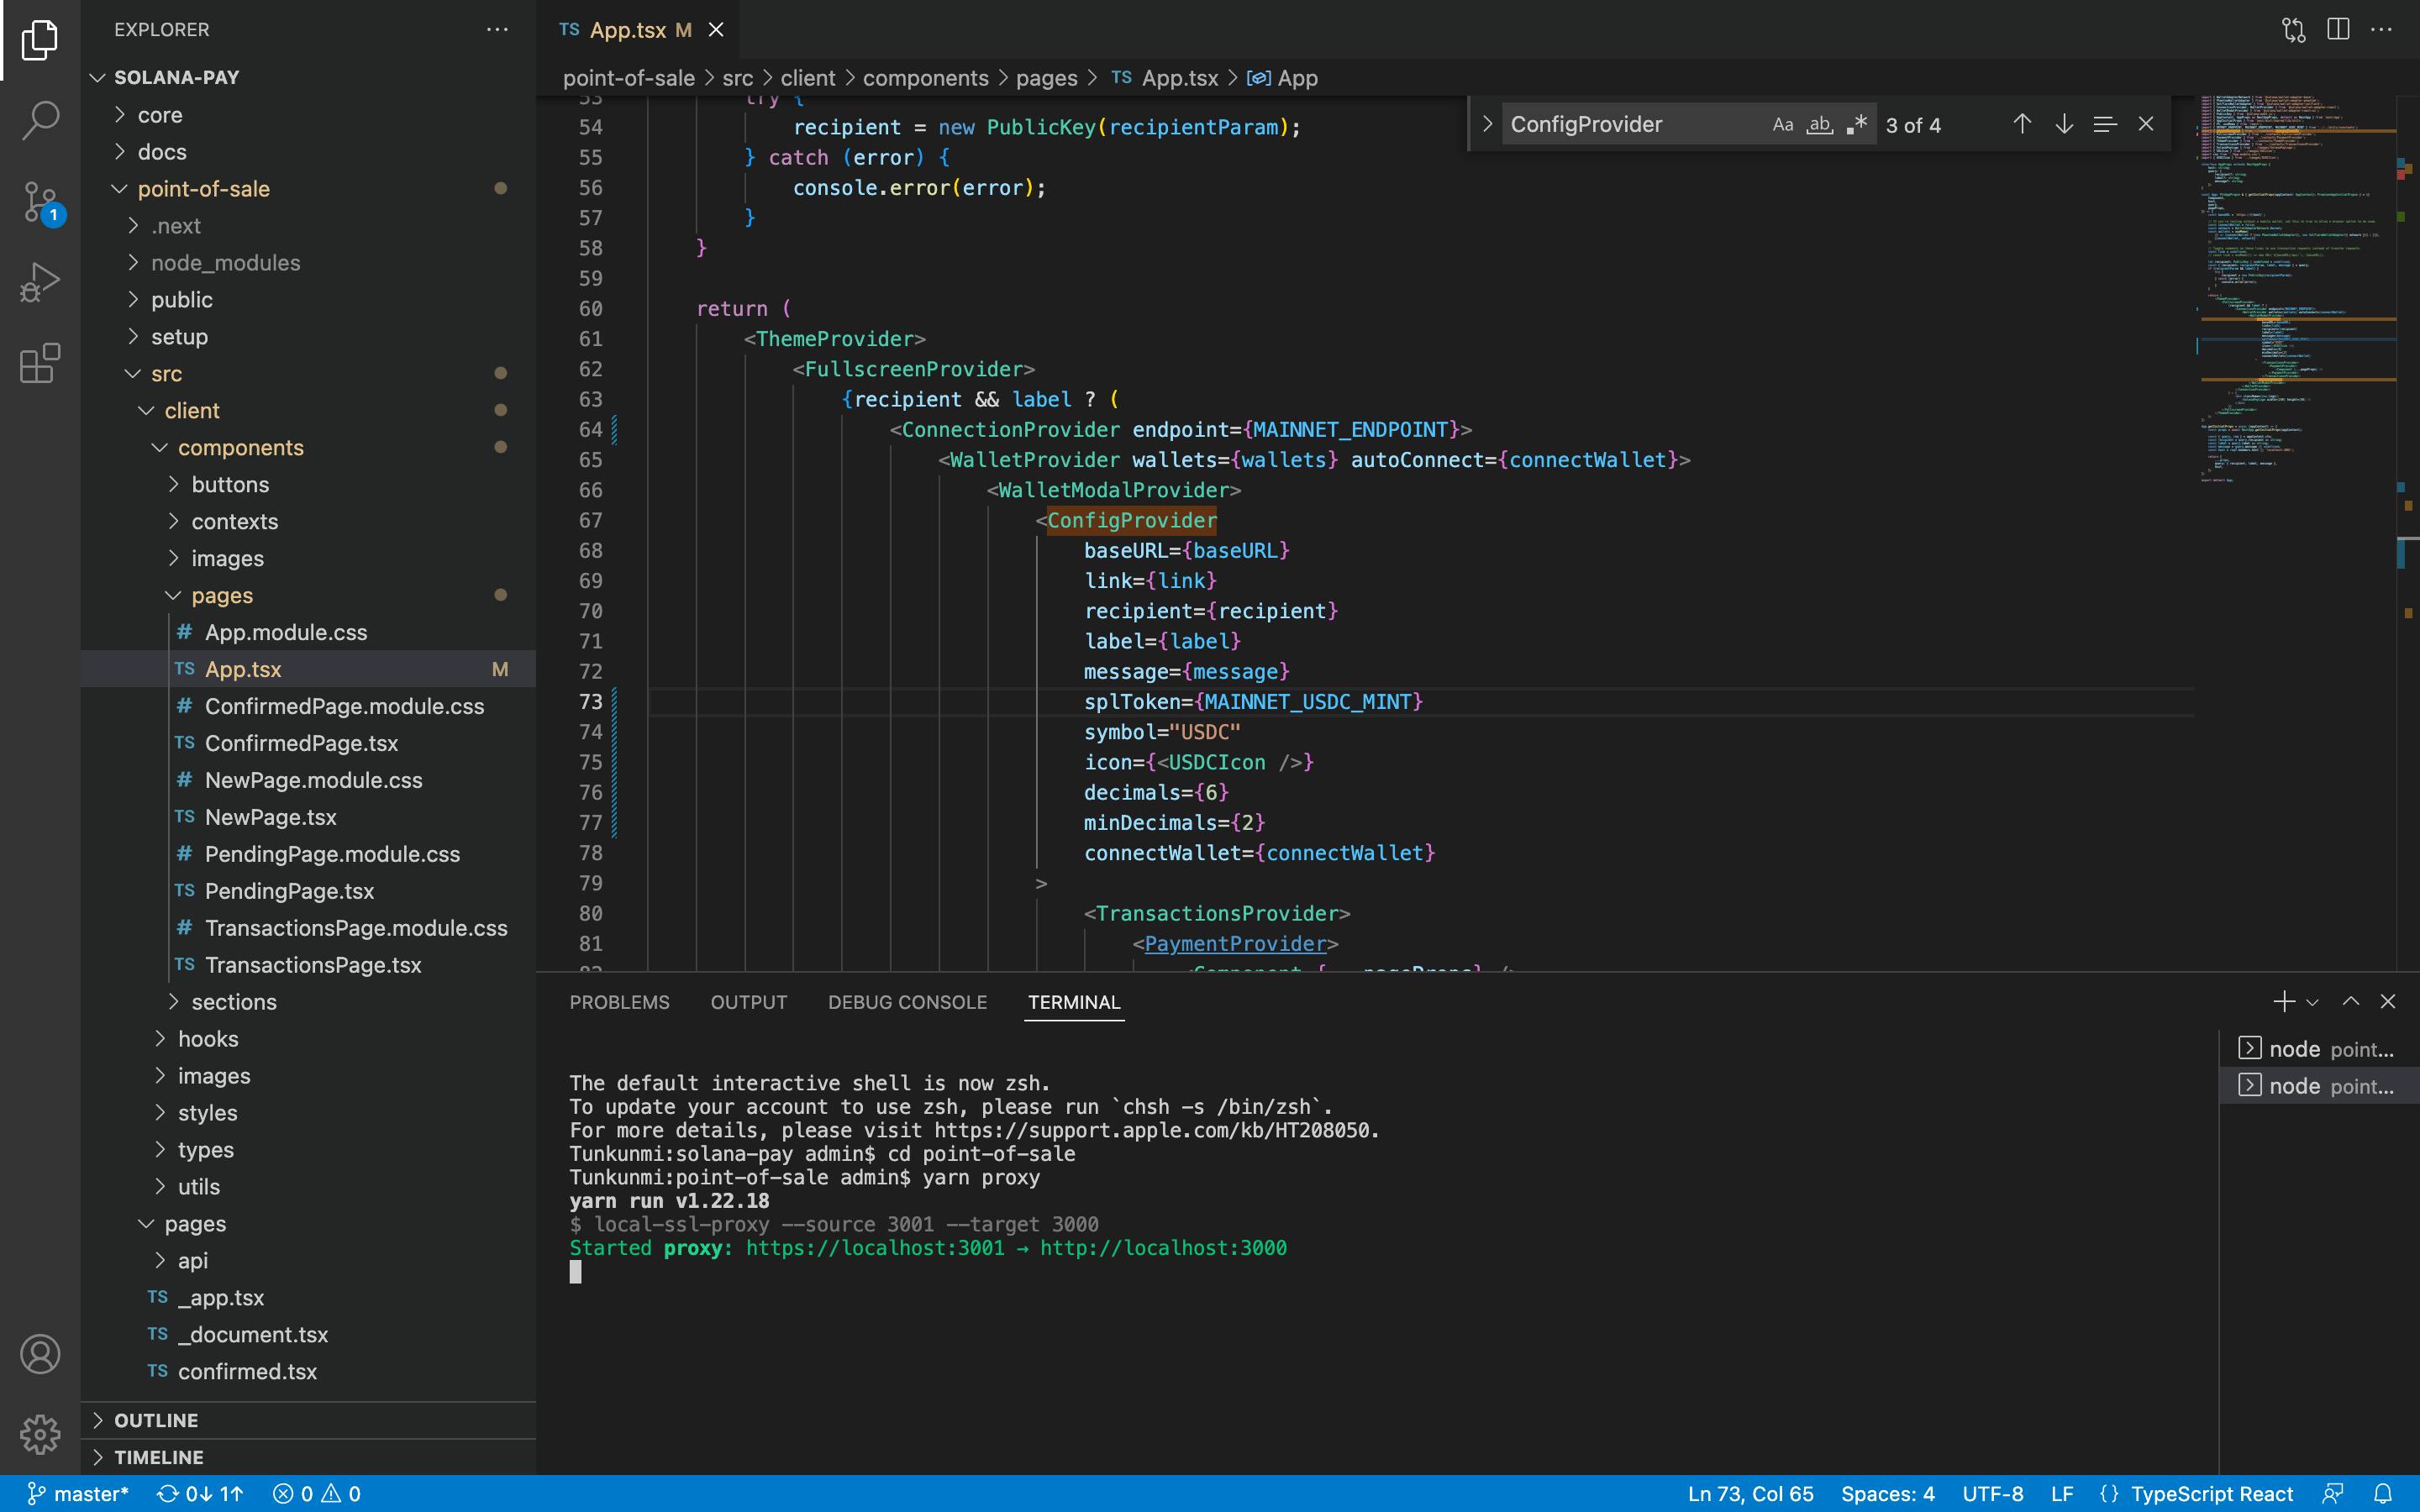
Step 2: Setup the $USDC token in the codebase
Edit the values in the ConfigProvider to match the code below
splToken={MAINNET_USDC_MINT}
symbol="USDC"
icon={<USDCIcon />}
decimals={6}
minDecimals={2}
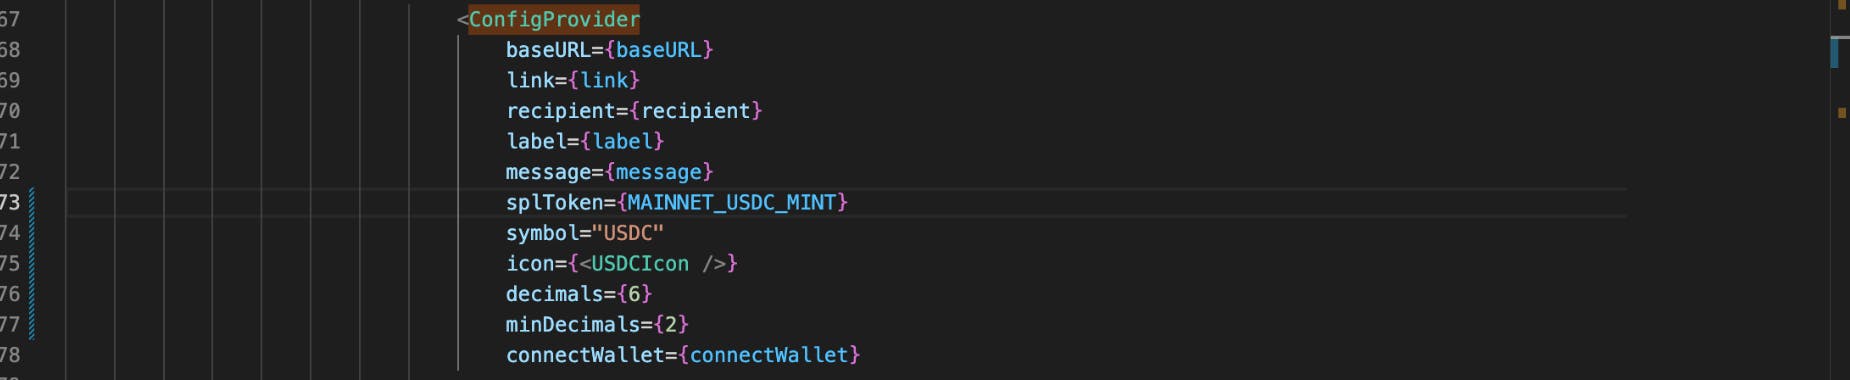
Voila, you have successfully switched the support of the token from $SOL to $USDC. In the code above, we set $USDC as the spltoken to accept, edited the symbol and icon values from $SOL to $USDC, and matched the decimals and minDecimals to correlate with the $USDC token.
You can confirm the decimals and other details of the token by copying the mint address of the token and pasting it at Solscan (Solana’s blockchain explorer). In the project folder, you can find this address in the file structure point-of-sale/src/client/components/utils/constant.ts.
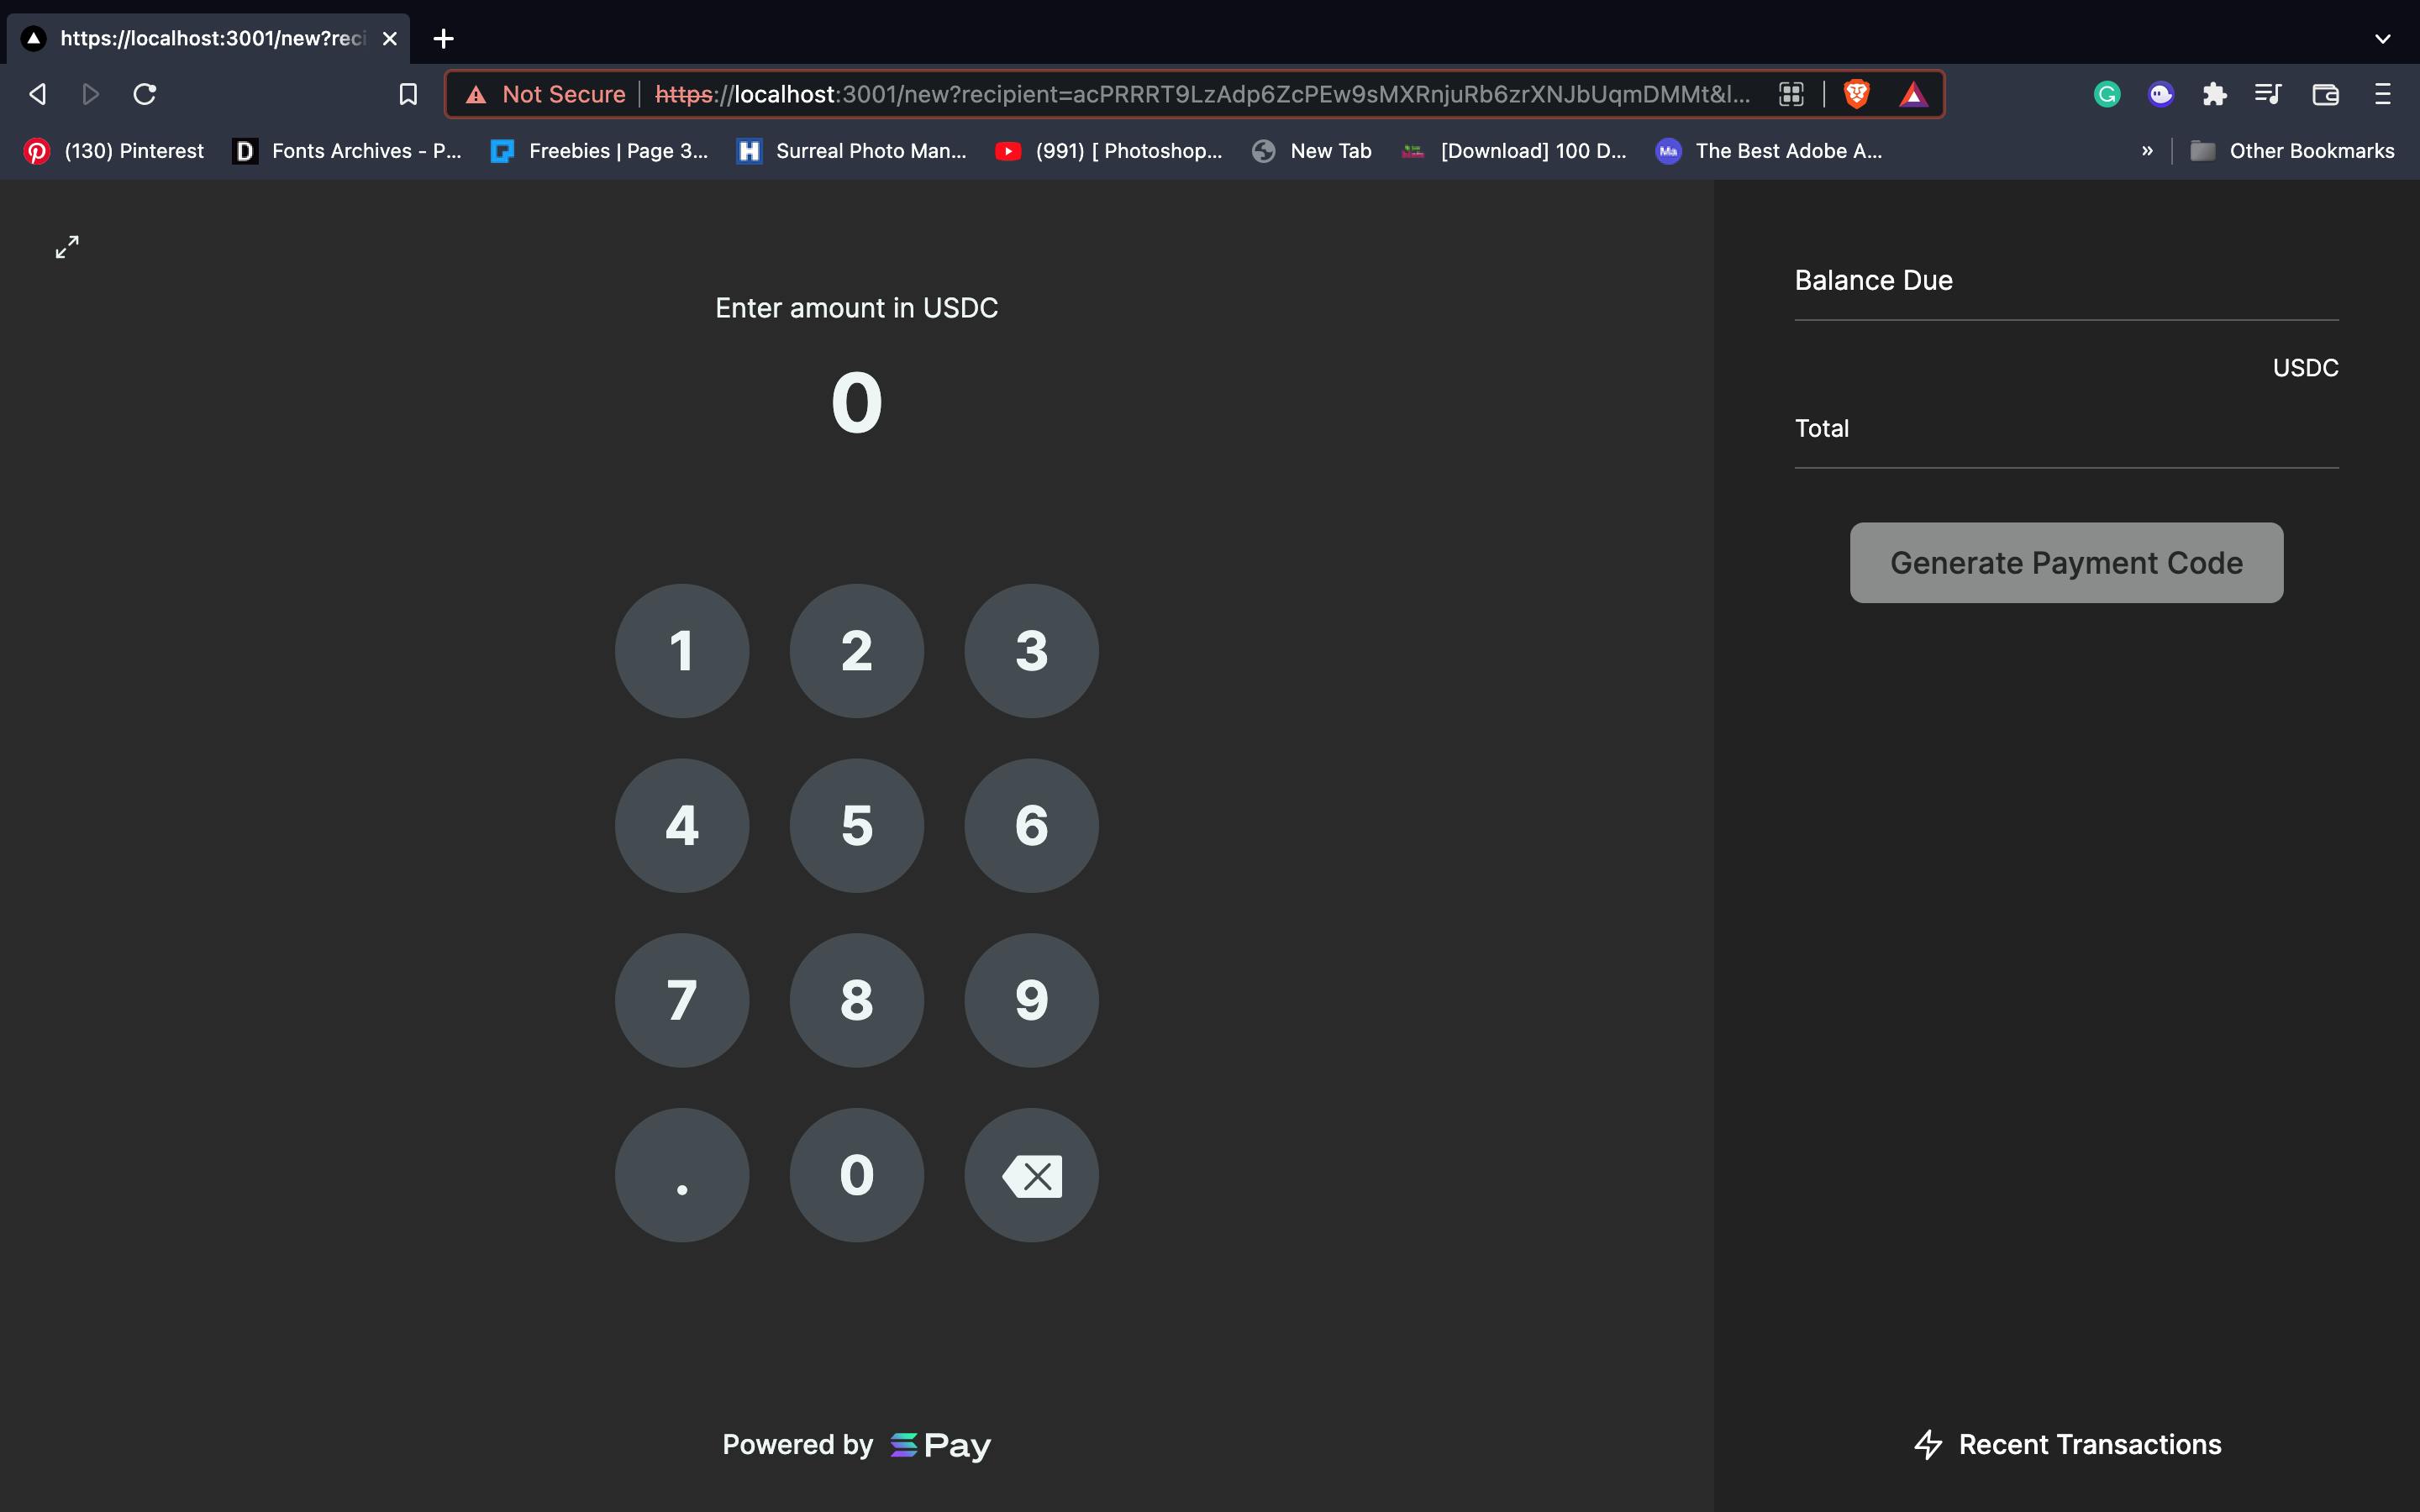
When completed, save the code and run it on your local machine, and the result should be similar to this:
Deploying the Solana POS on Vercel
Vercel is a cloud platform for developers to host websites and web services. It supports frontend frameworks and allows for easy and automatic scaling. We will be deploying our Pos payment system there.
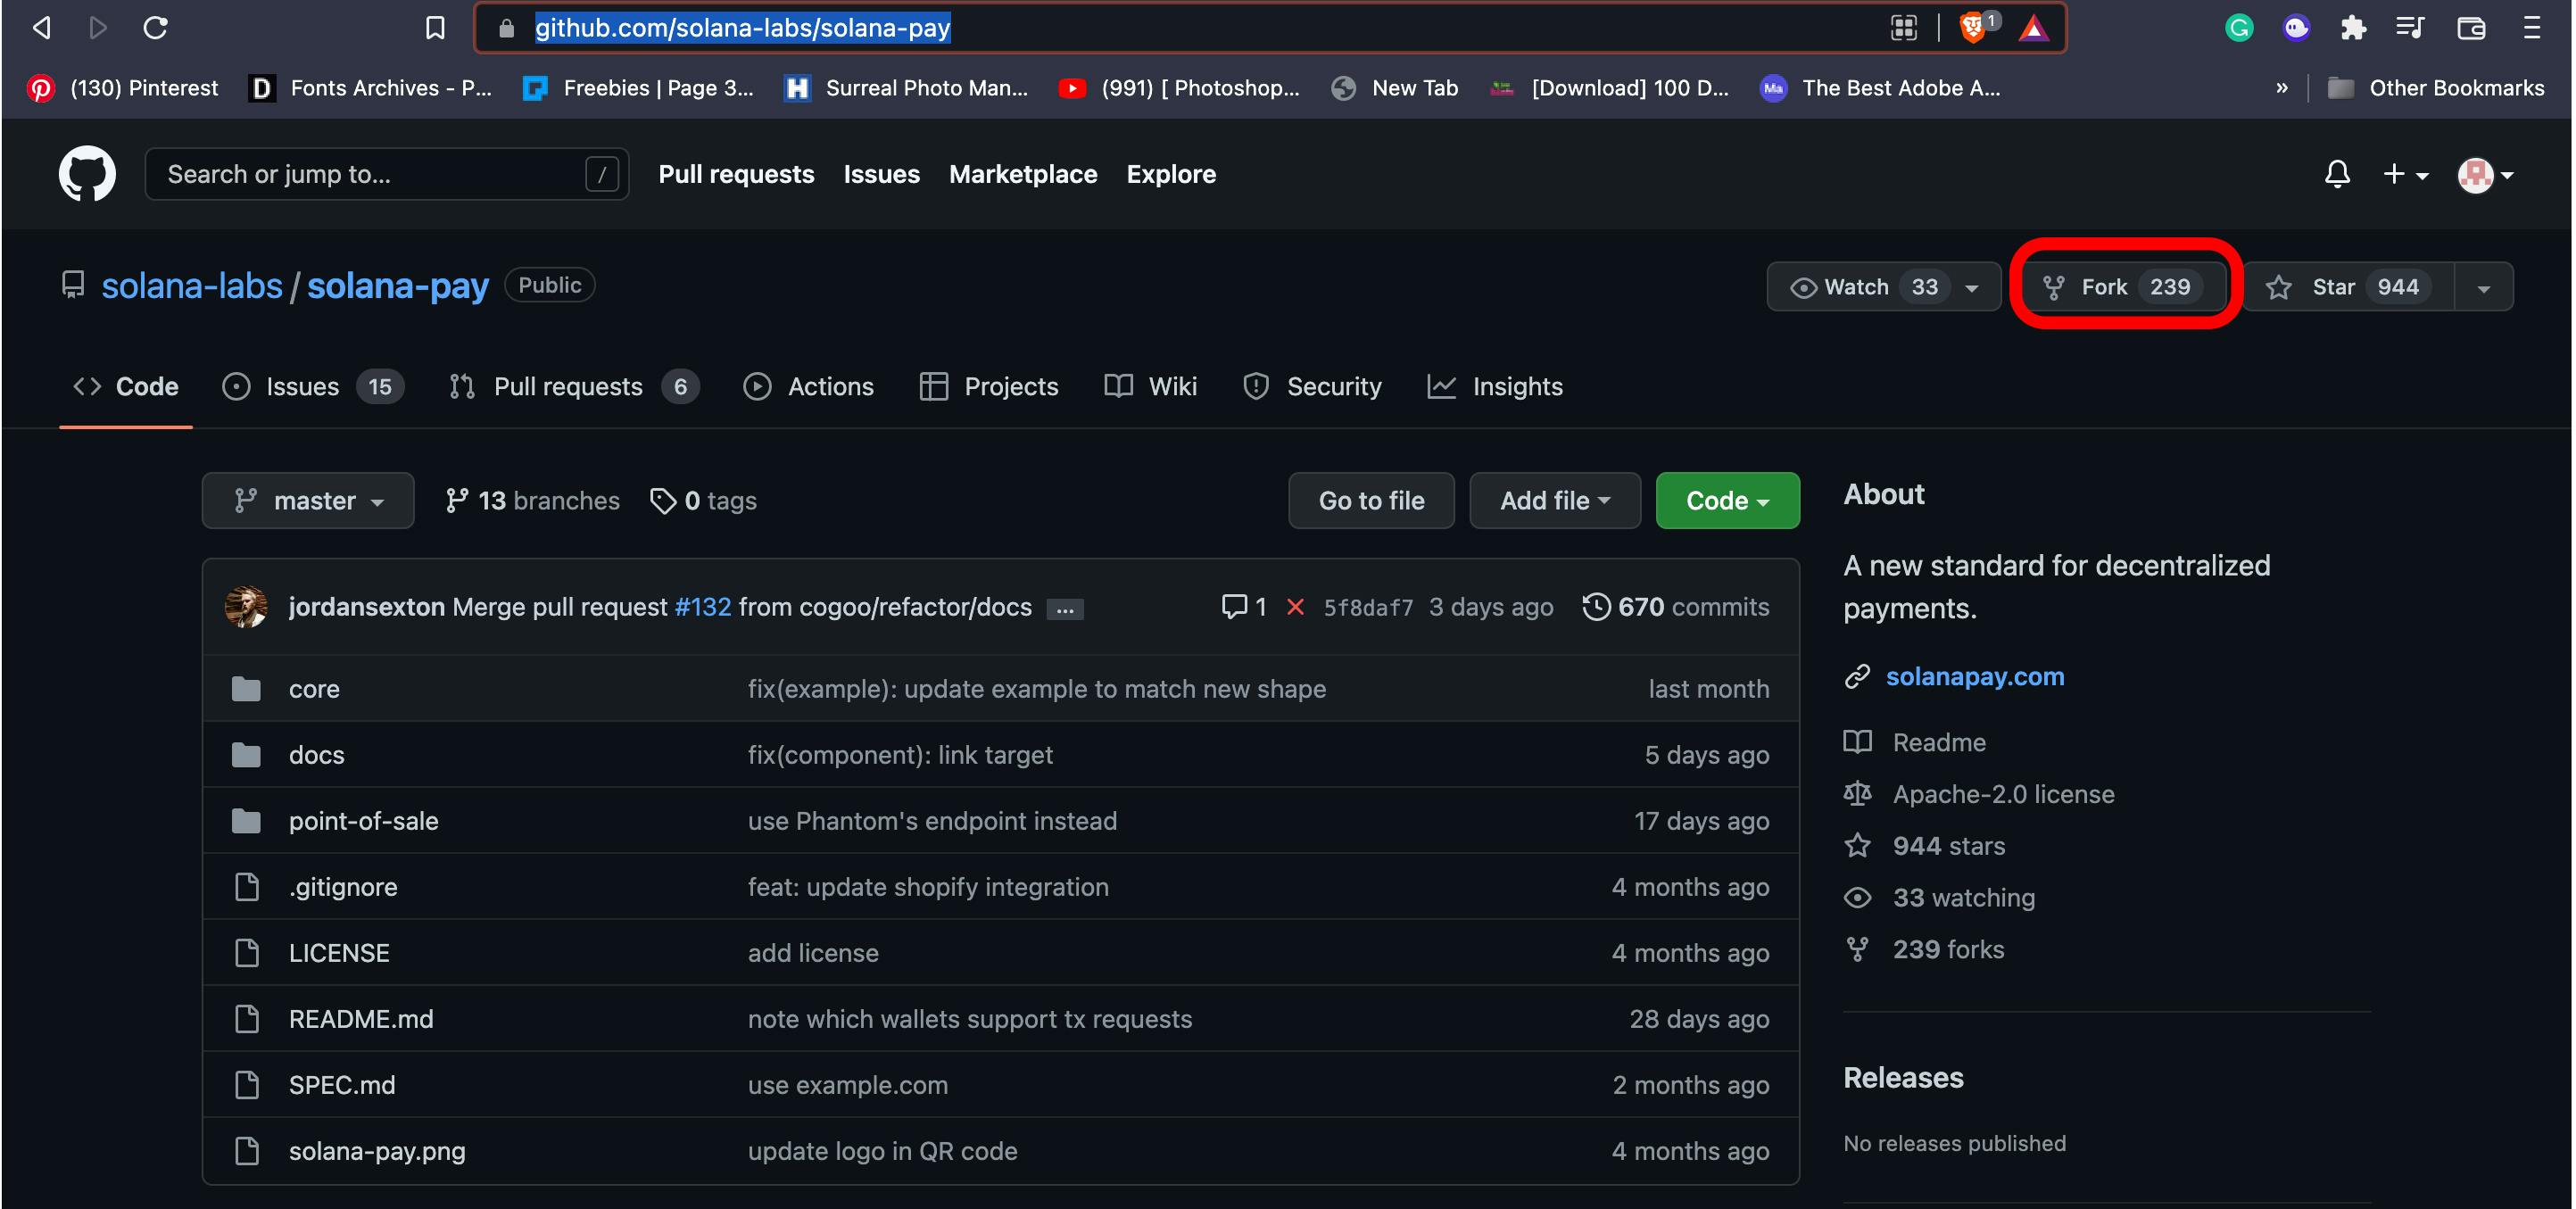
Step 1: Fork the original repository to your GitHub
In other to proceed, we have to fork the original repository to your GitHub and move the Pos system from Devnet to Mainnet as shown earlier, you can decide on the token you would like the Pos system to accept, but for this article, we will be making use of the stable $USDC token.
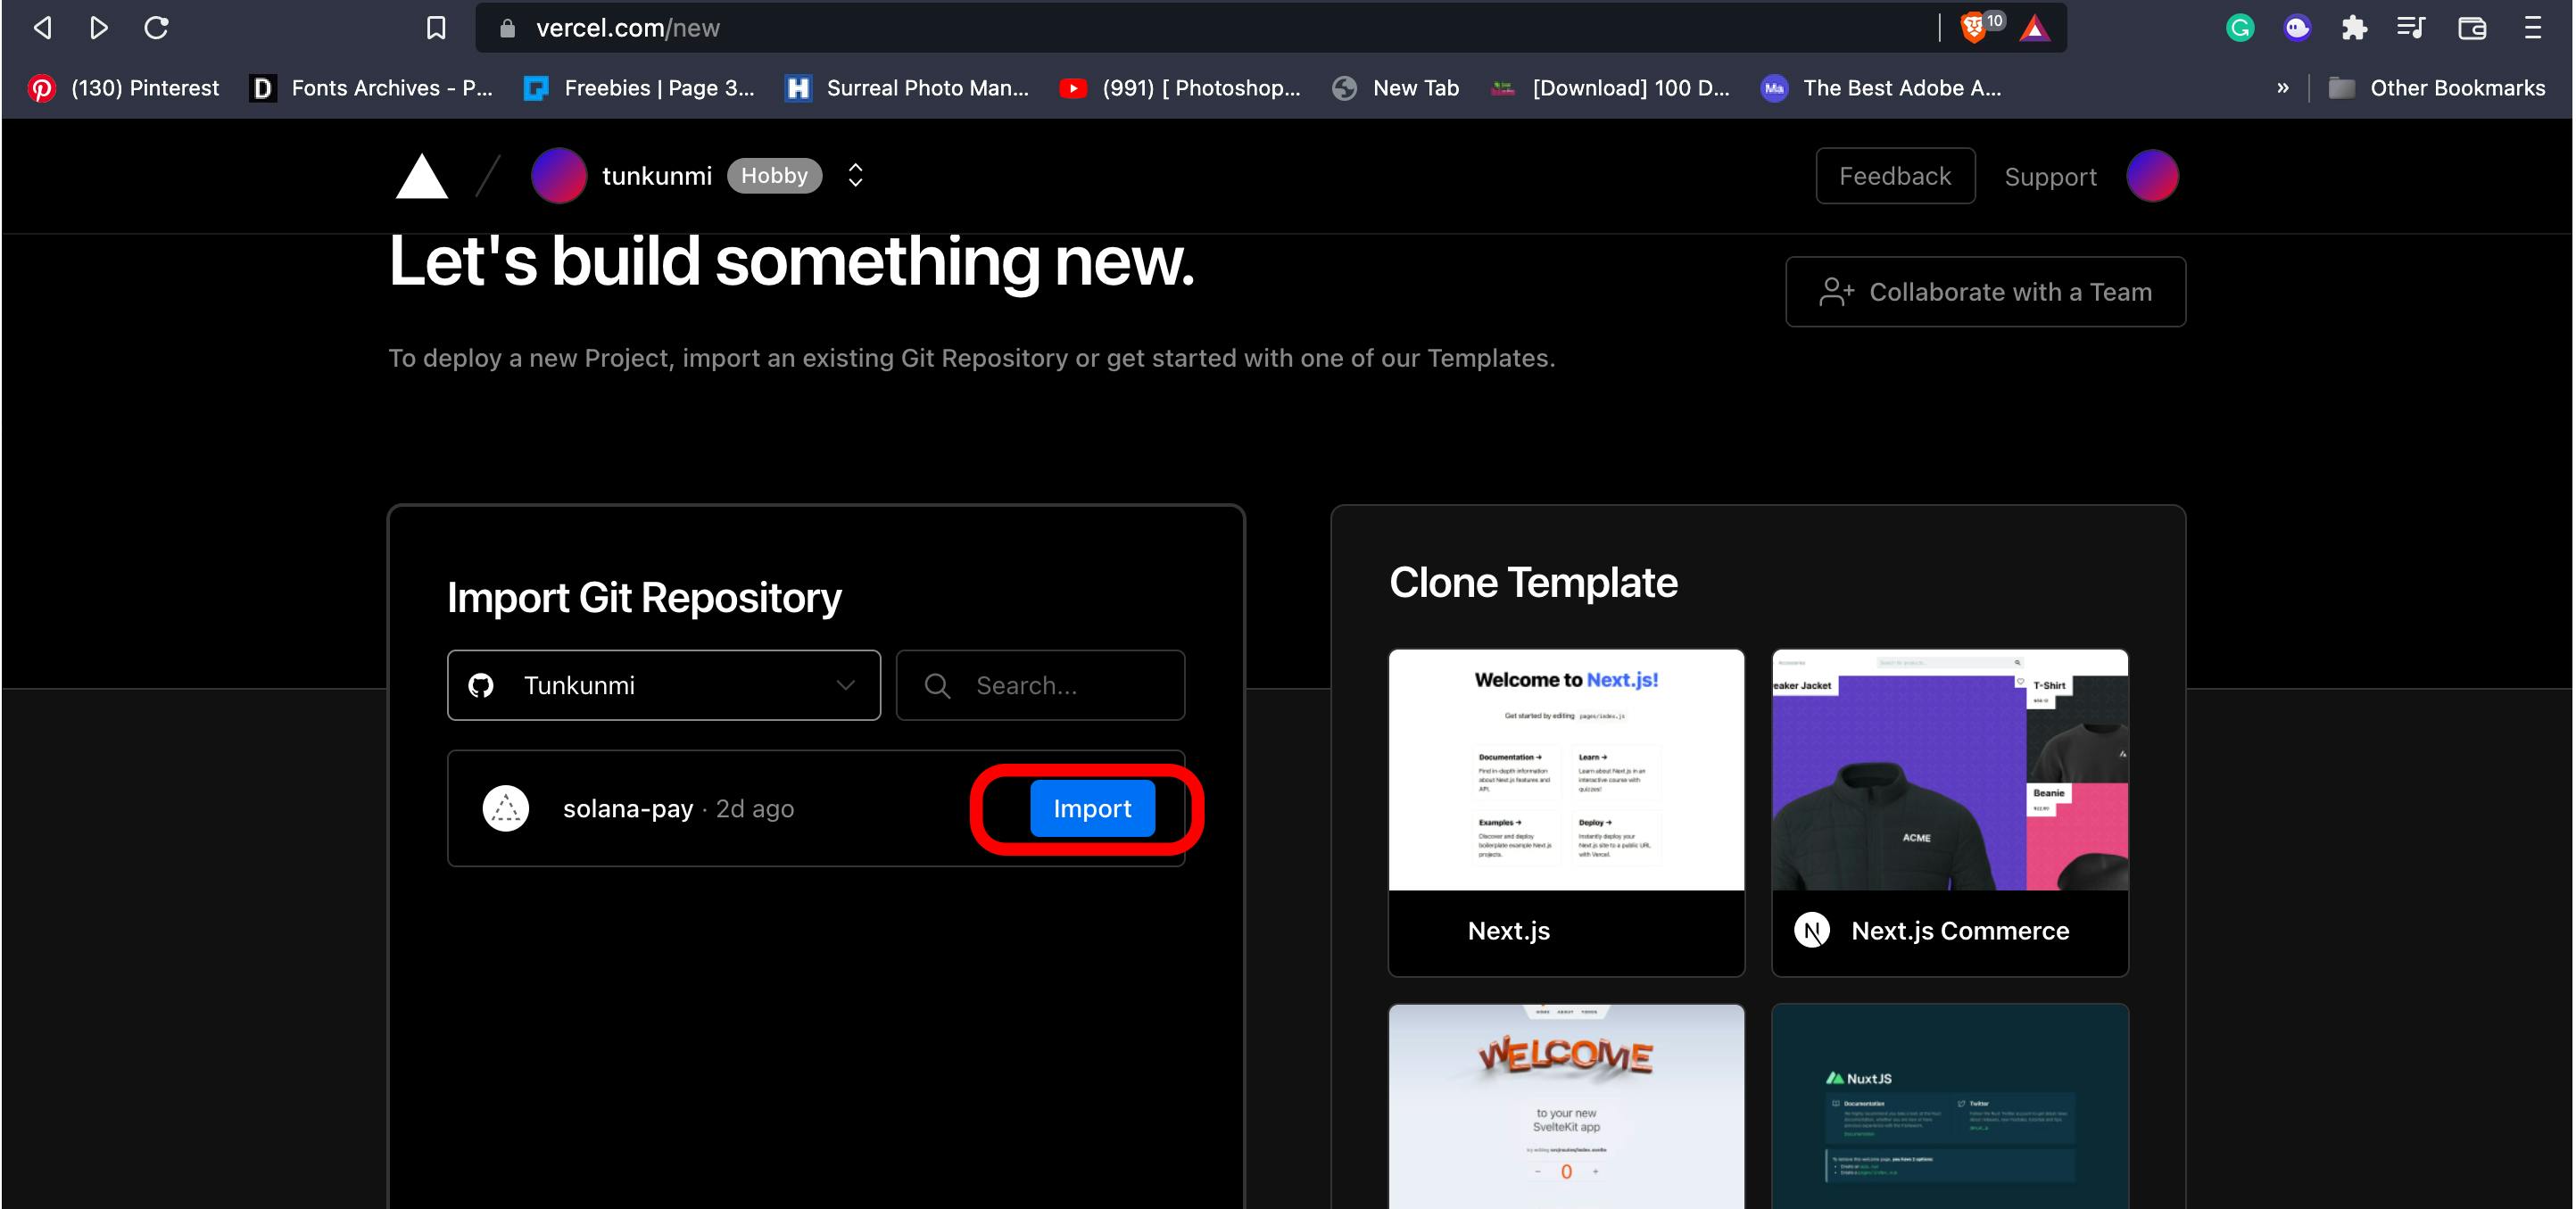
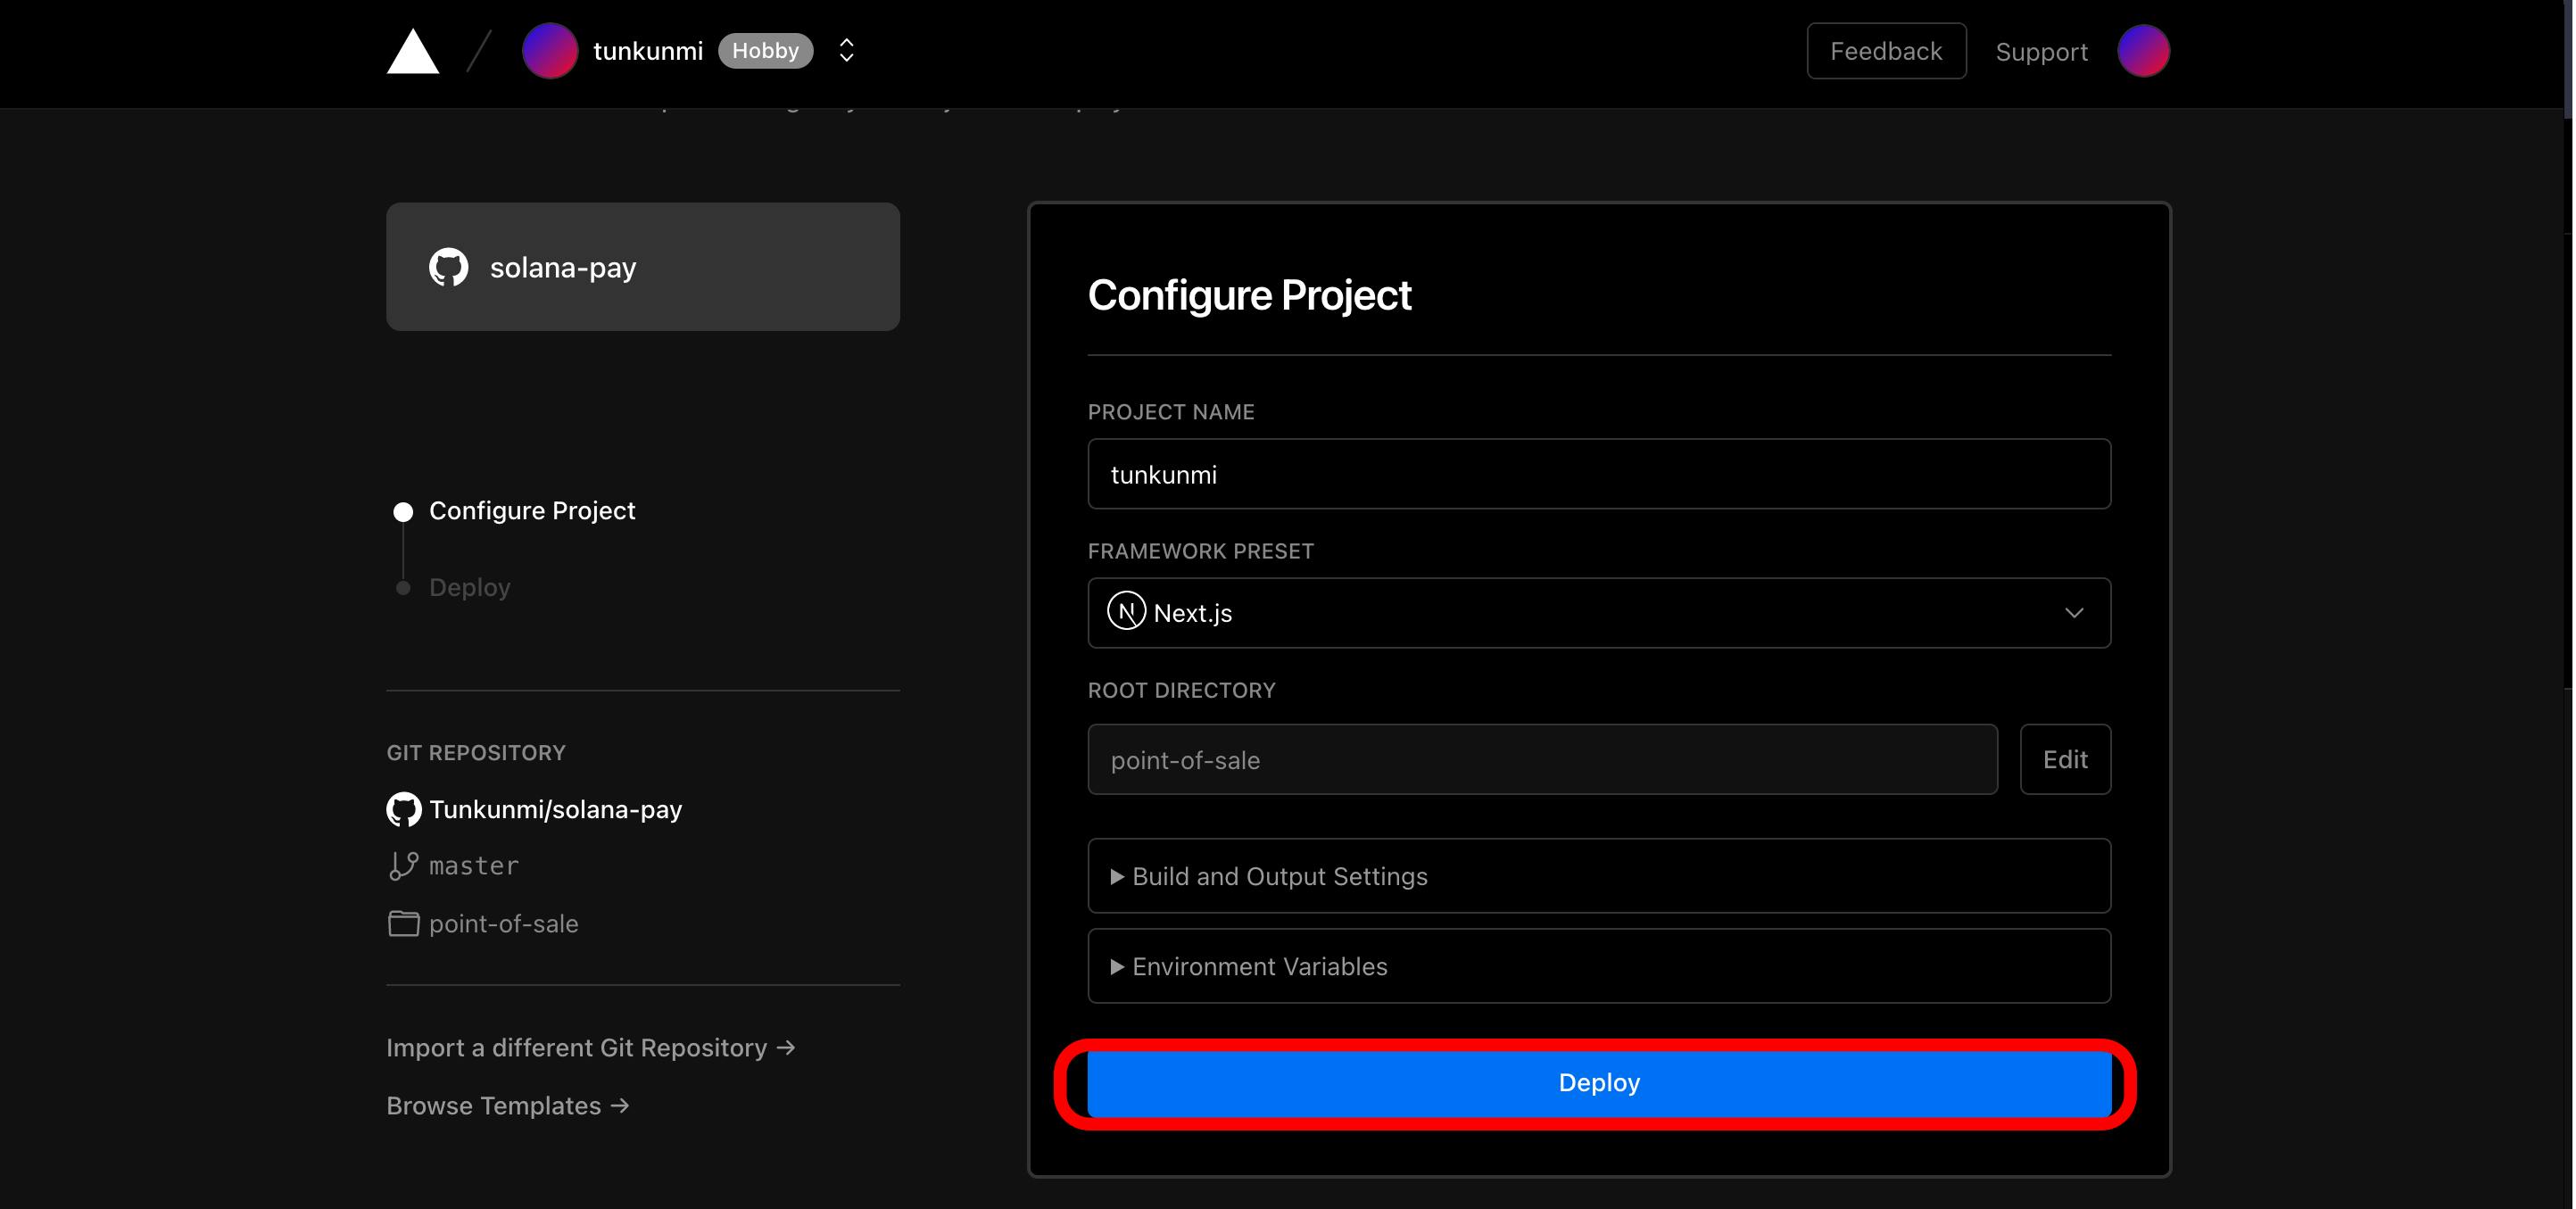
Step 2: Log in to Vercel and create a new project
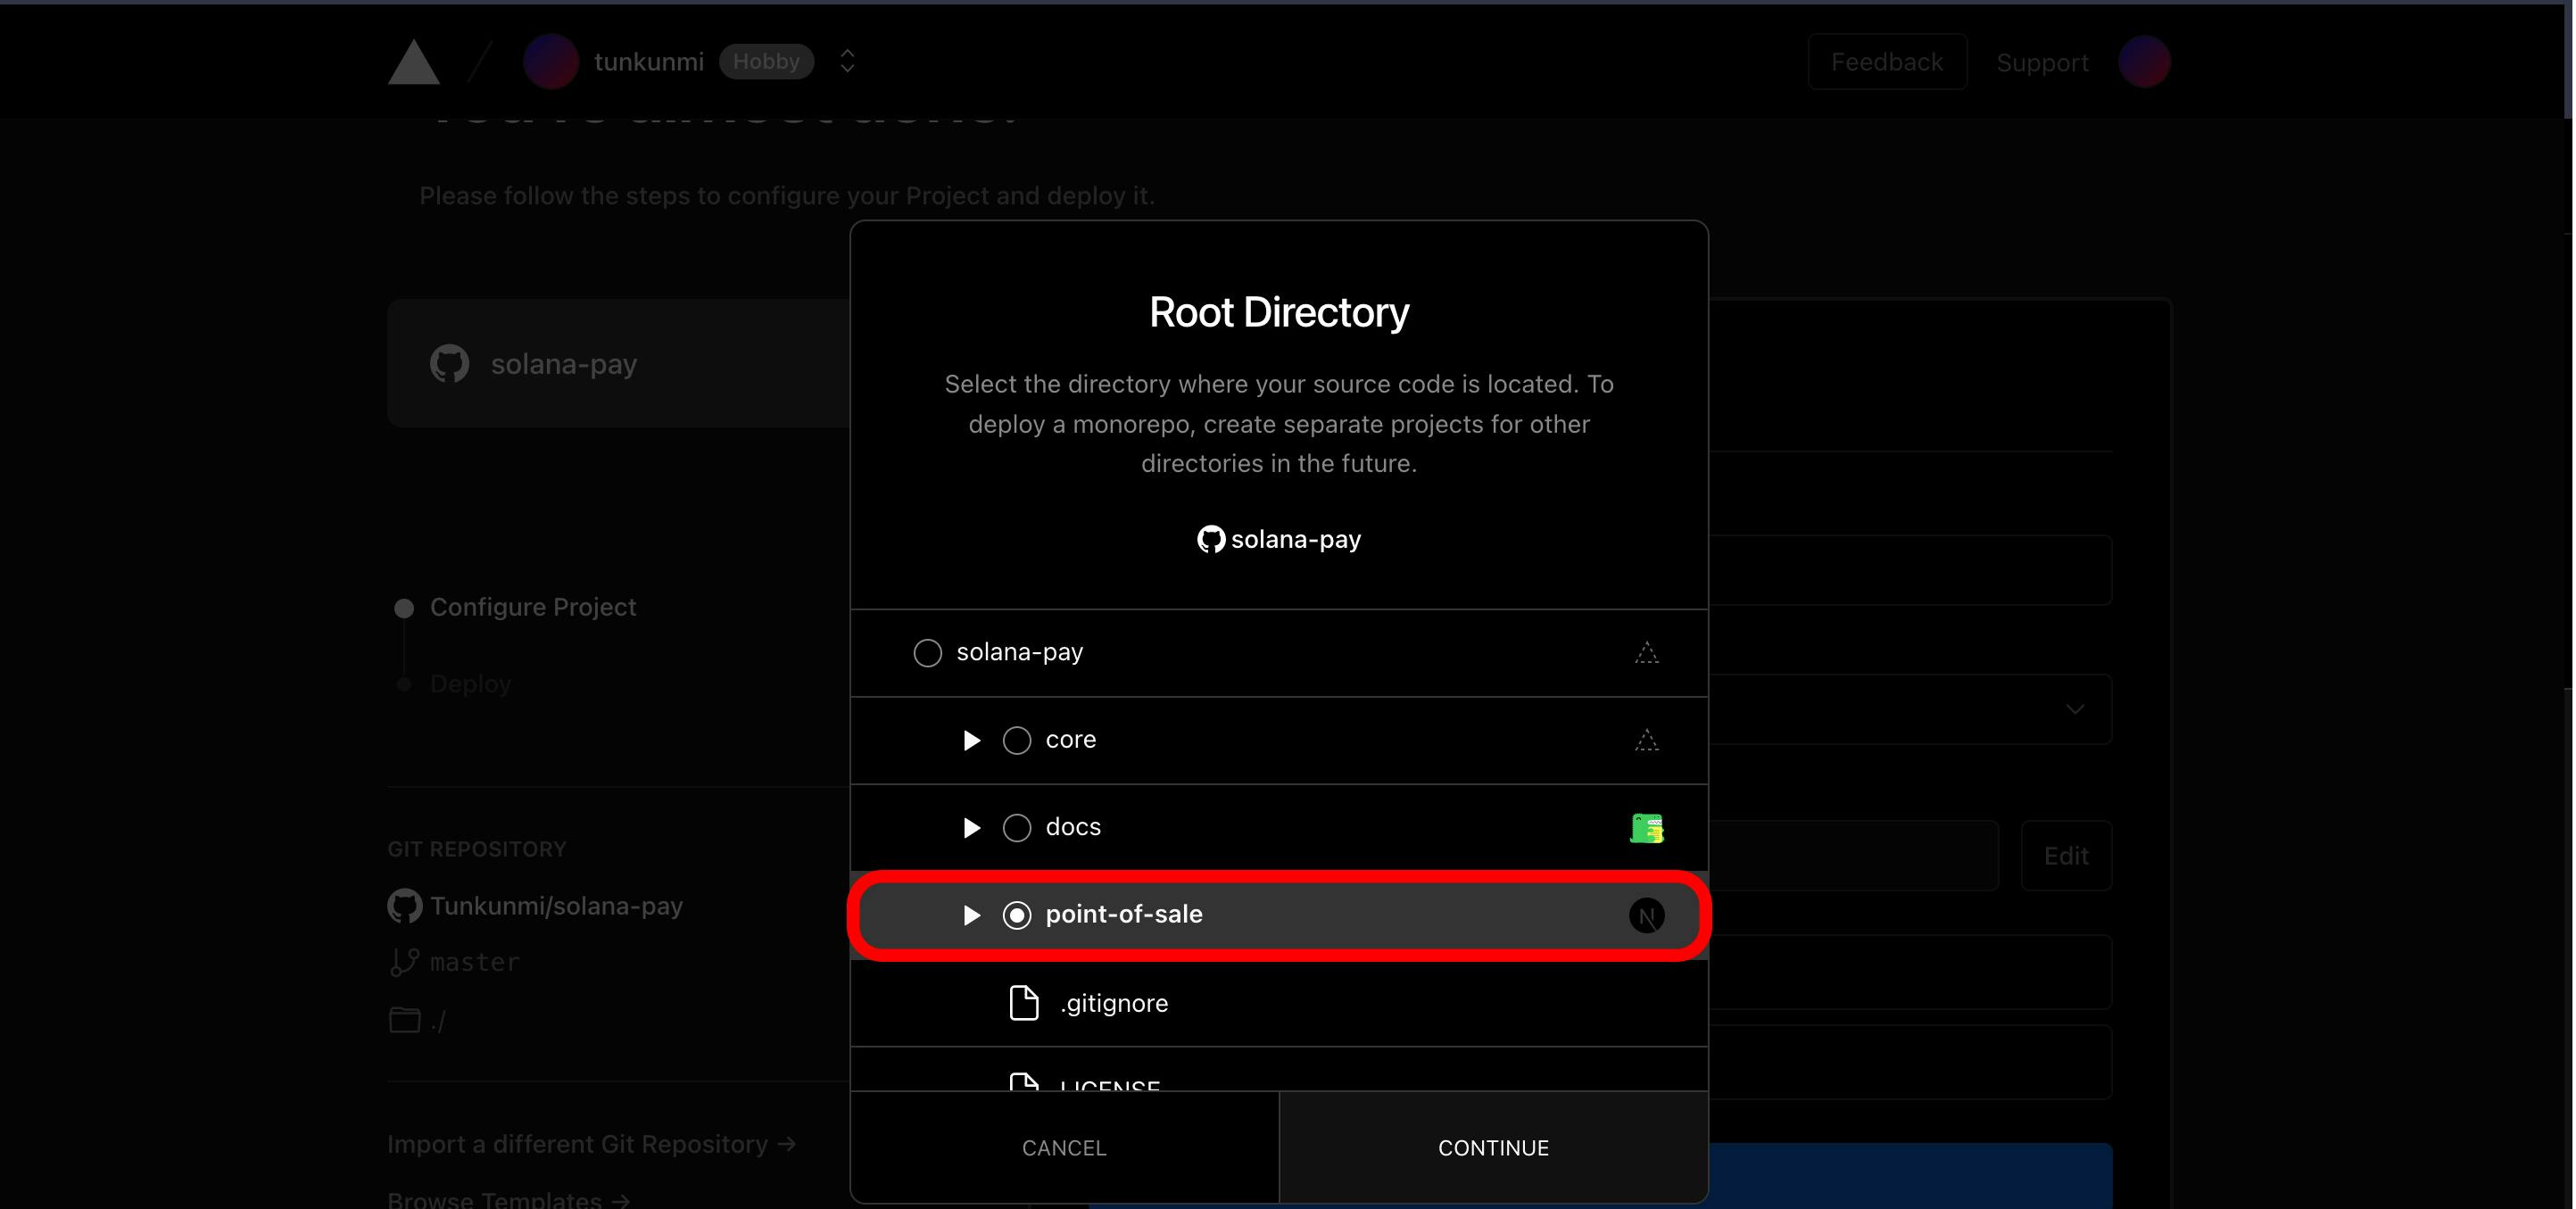
Create a new project on Vercel, import the forked repository, and set the root directory to point-of-sale.

Step 3: Set the project name and Framework
Set the project name to your preferred choice and Framework to Next.js
Step 4: Deploy it
With all the necessary settings made, deploy it
Adding Solana Pay Pos to your website
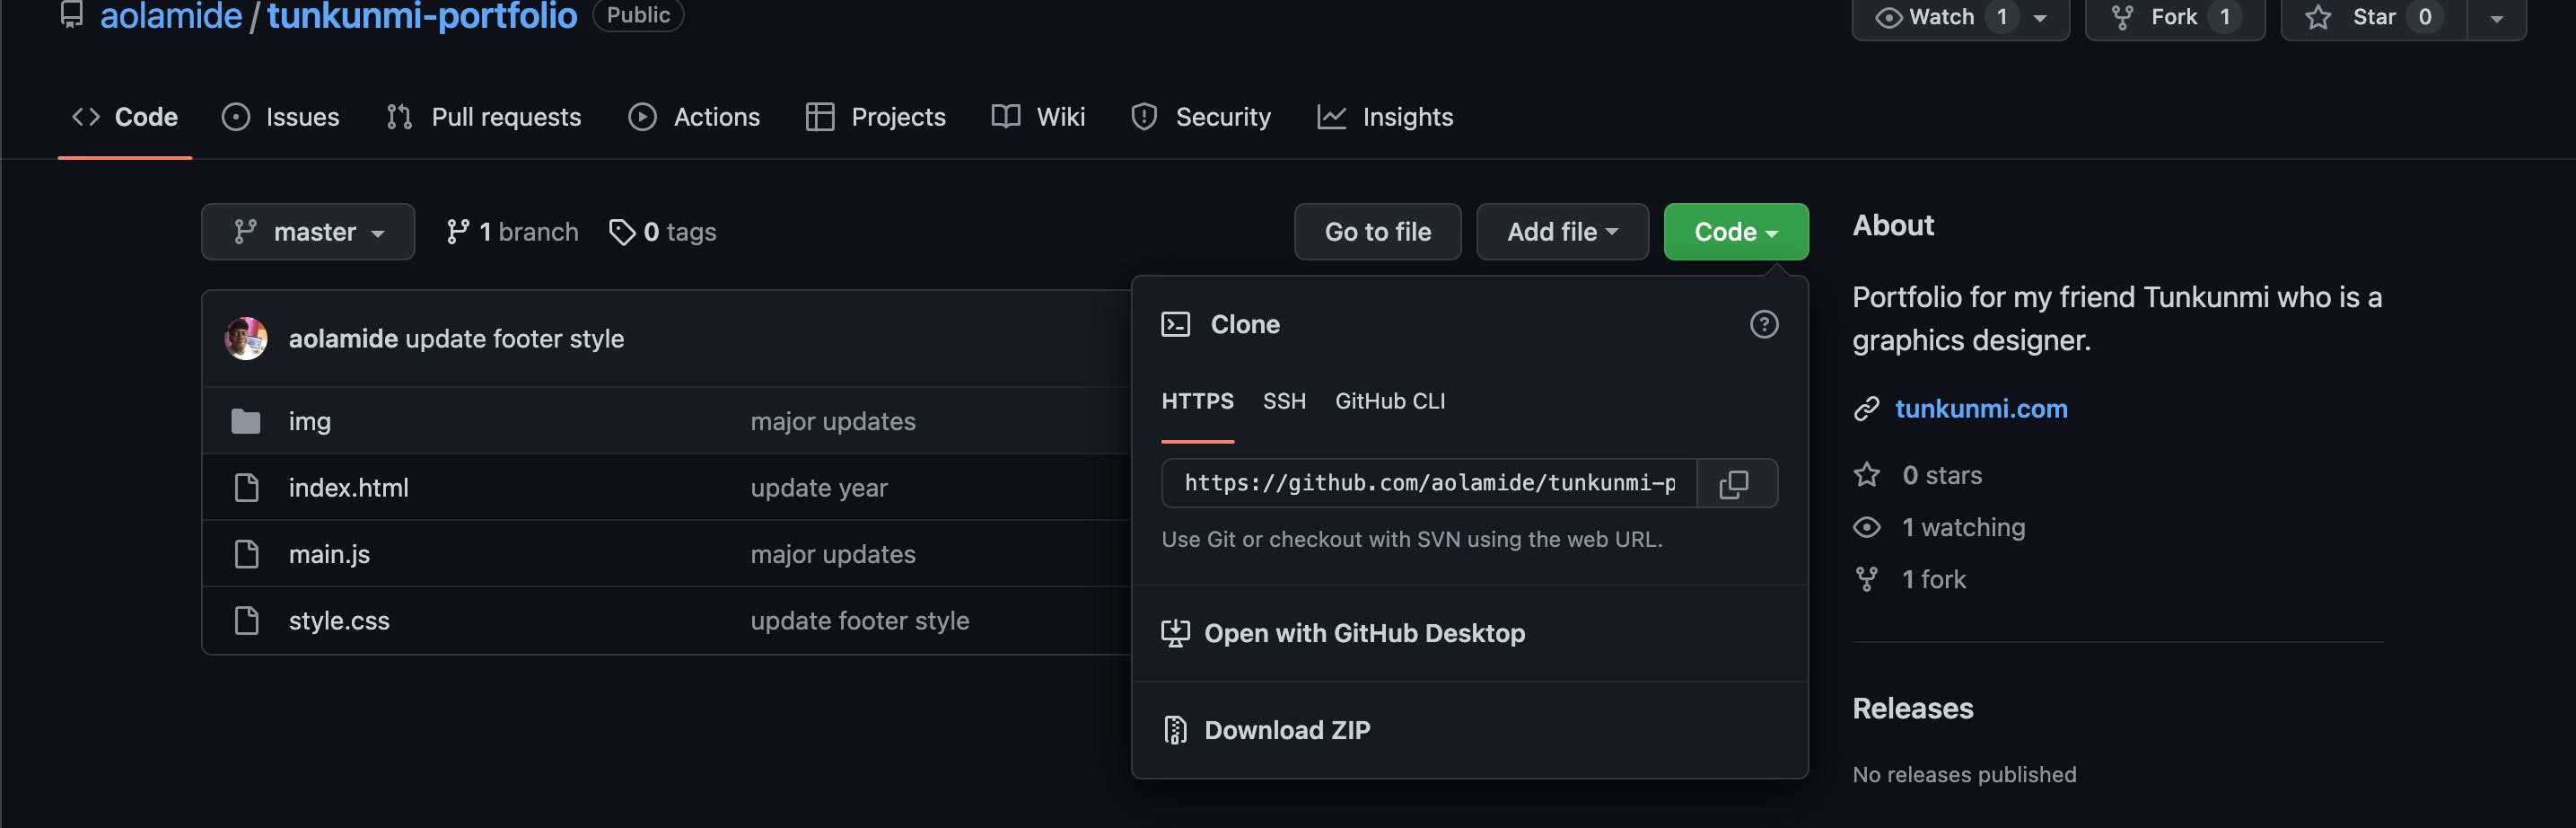
Now that we have deployed the Pos payment system, we can now proceed to add it as a payment page on our website. I will be using an already existing website built by a close friend. It served as my former portfolio website. Here's the link to the GitHub repository.
Step 1: Clone the repository and open up the folder in Vscode.
You can clone the repository directly to your desktop or you can choose to use the git command directly in your vscode
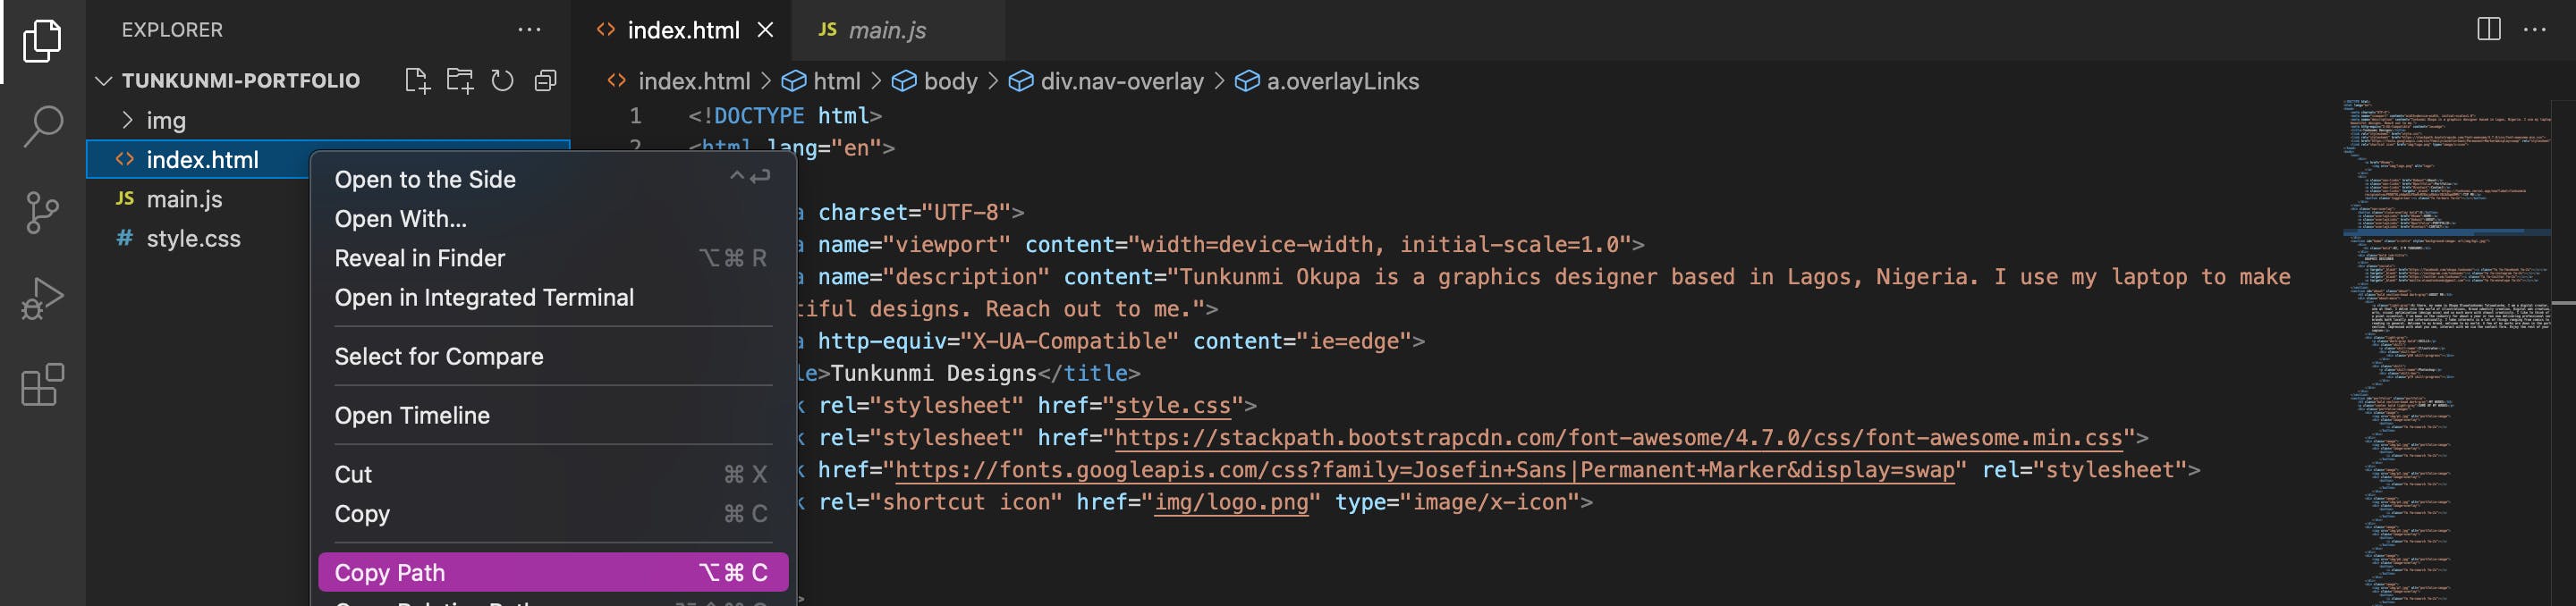
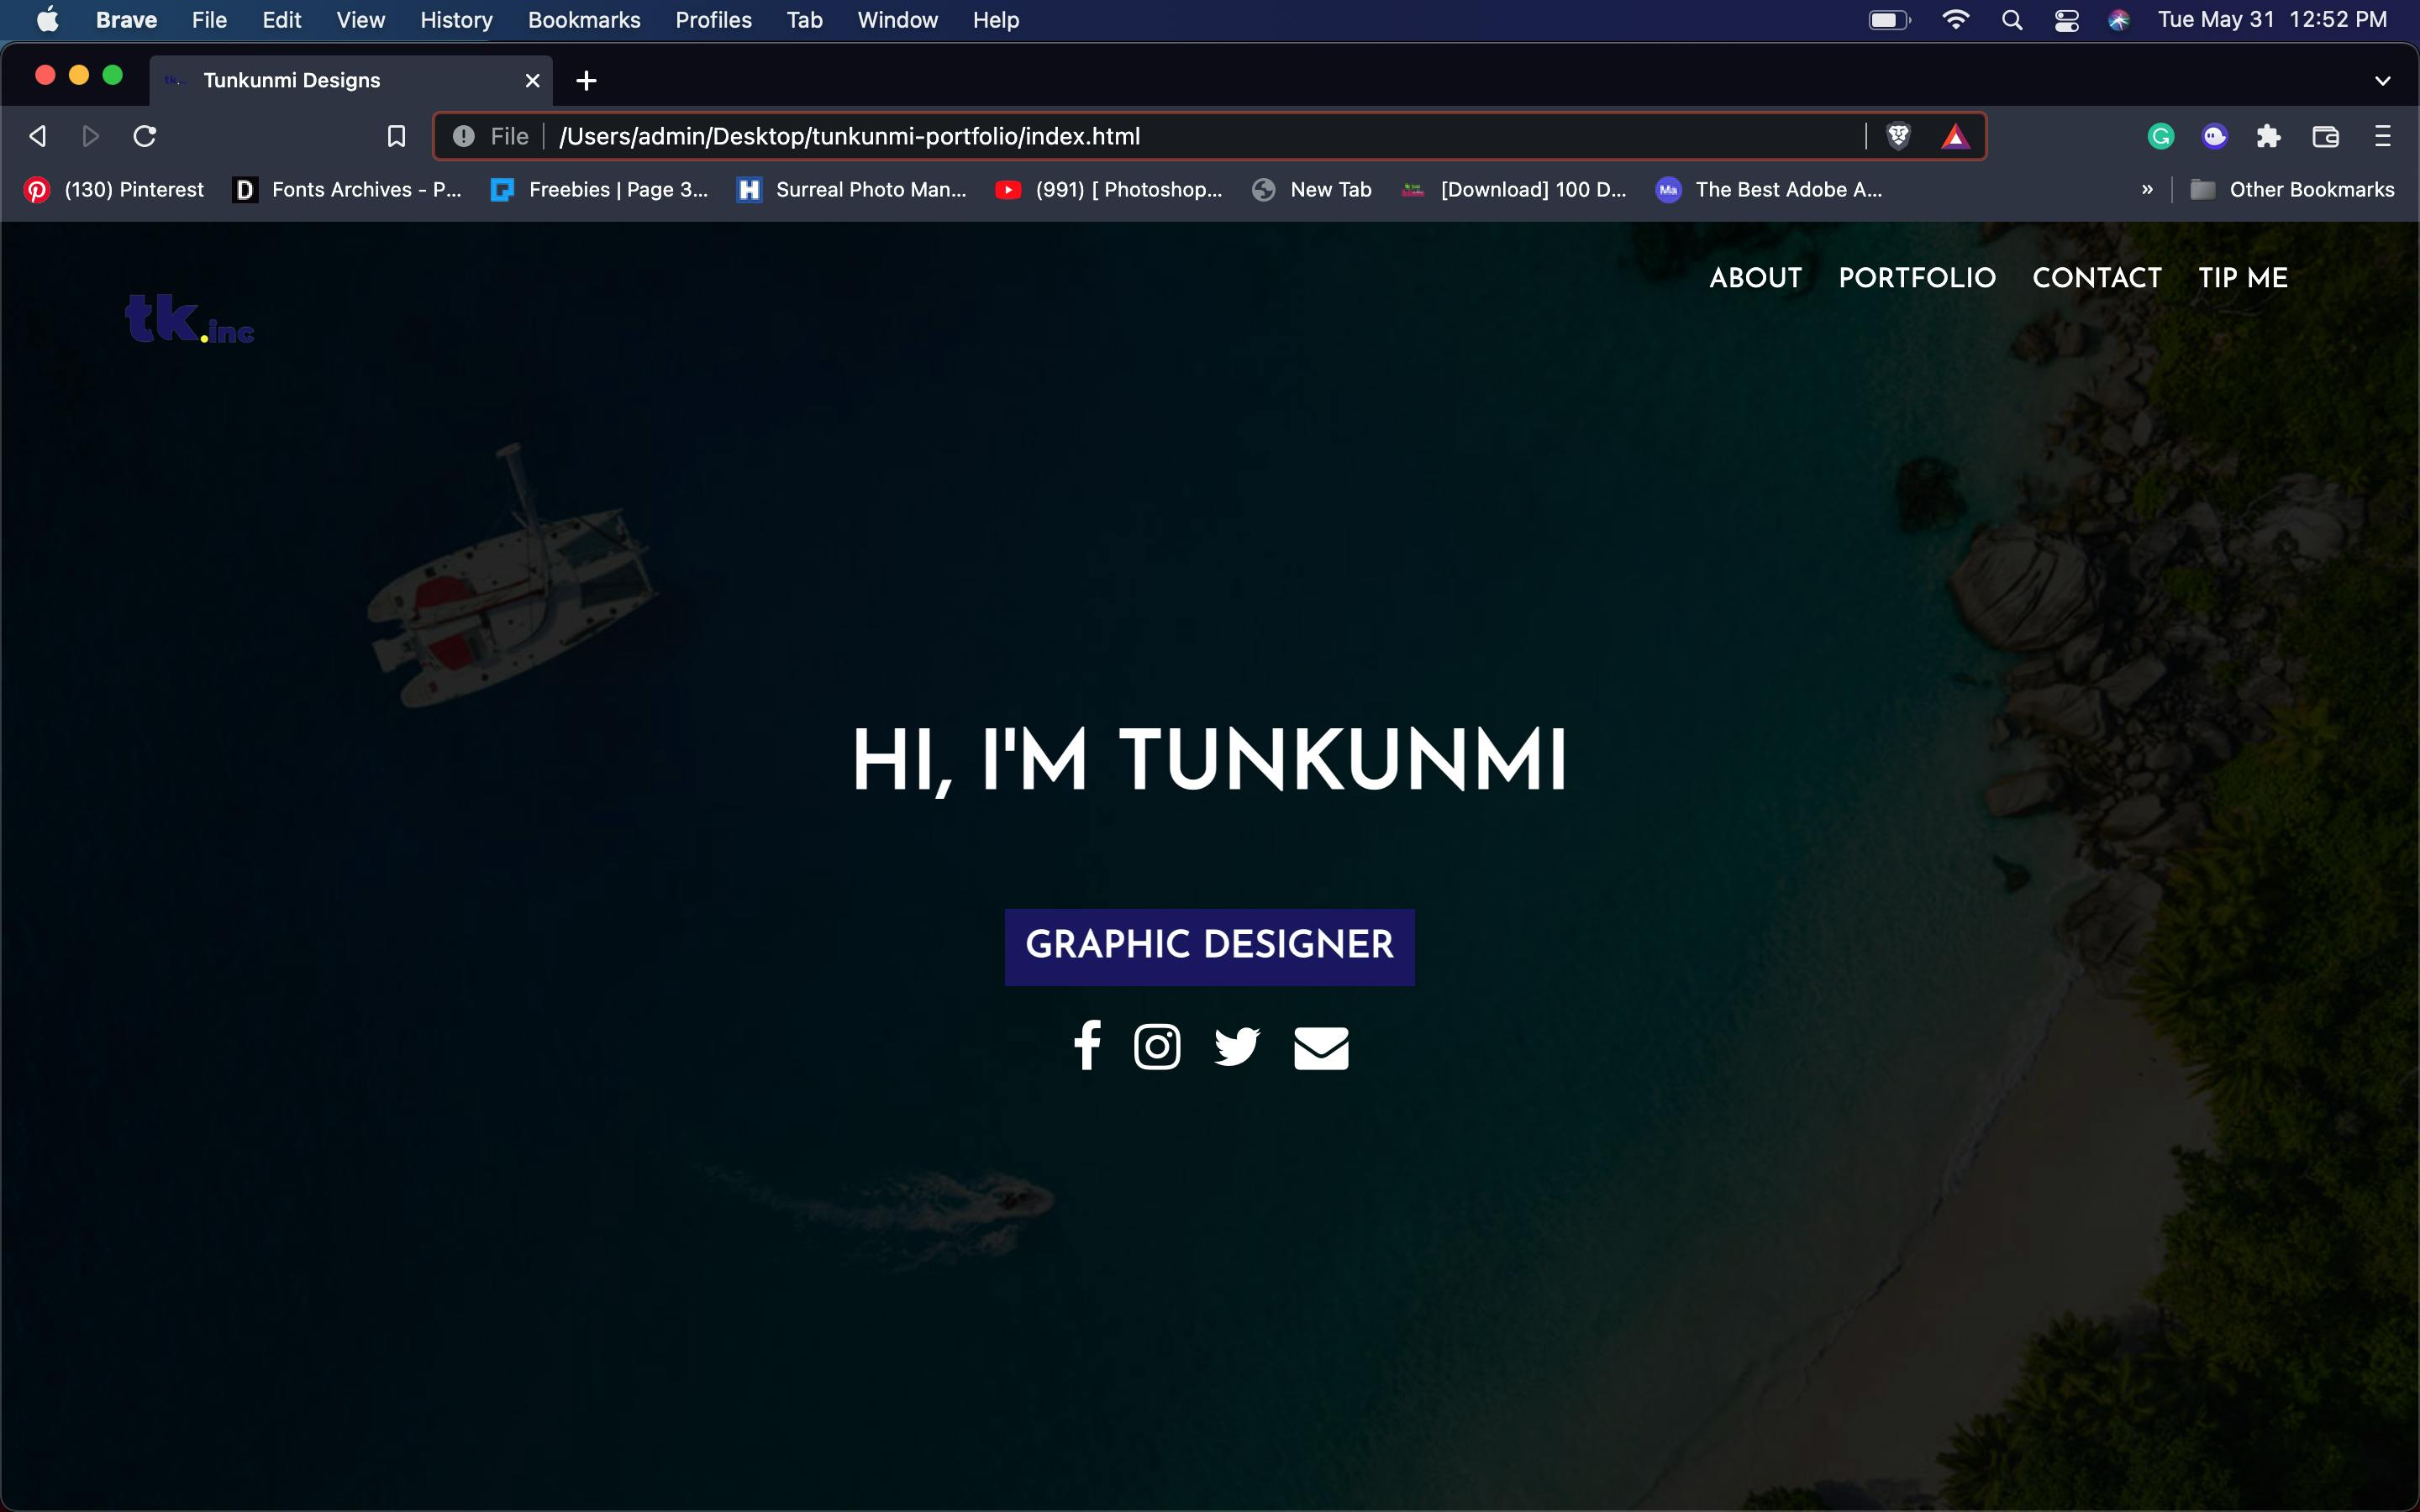
Step 2: Launch the website locally
Right-click on the index.html file and copy the path to your browser to launch the website locally (this will help us to see the changes being made)
Step 3: Composing the payment page link
Copy the Point-of-sale address below and edit the domain from localhost to the domain of your deployed Vercel app. Also, add your wallet address to the recipient tag, and you can choose to edit the label to a preferred name.
https://localhost:3001?recipient=Your+Merchant+Address&label=Your+Store+Name
When completed, the result should be similar to this but with your own details
https://tunkunmi.vercel.app/?recipient=acPRRRT9LzAdp6ZcPEw9sMXRnjuRb6zrXNJbUqmDMMt&label=Tunkunmi
As we advance, we will refer to this as our “payment page link”
Step 4: Setting up the payment page
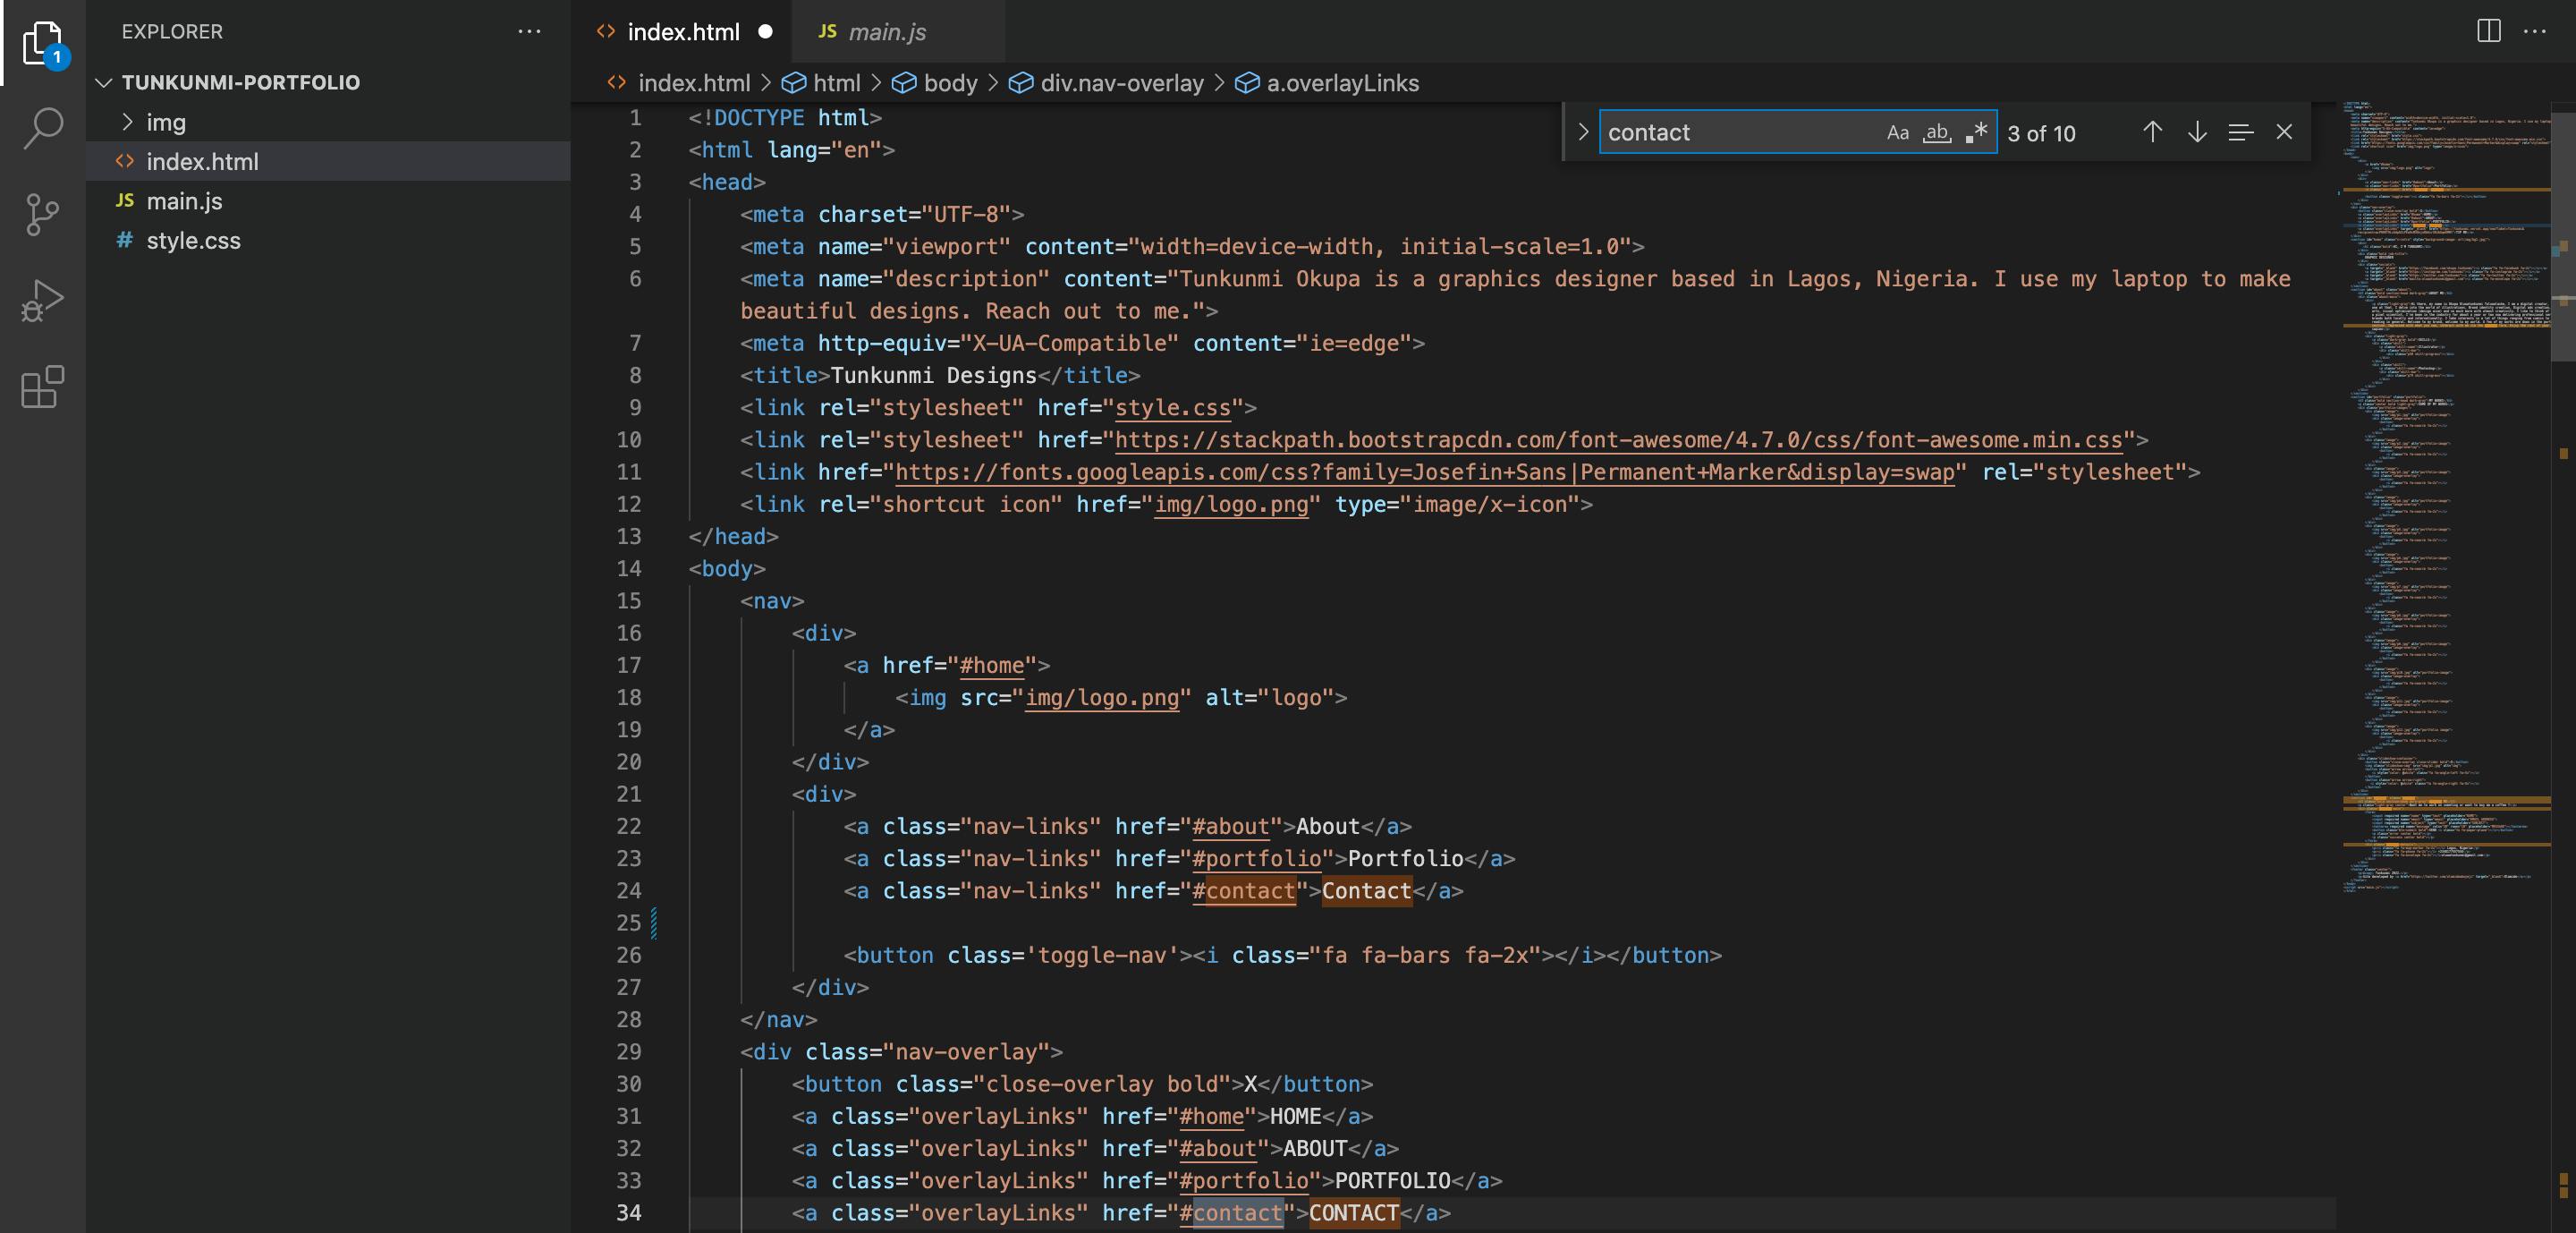
Navigate to contact within the codebase, you should see two sets within the codebase, input the code below in a new line under each.
<a class="overlayLinks" target="_blank" href="">TIP ME</a>

Input your payment page link in the href. The result should be similar to this but with your details when completed.
<a class="overlayLinks" target="_blank" href="https://tunkunmi.vercel.app/?recipient=acPRRRT9LzAdp6ZcPEw9sMXRnjuRb6zrXNJbUqmDMMt&label=Tunkunmi">TIP ME</a>
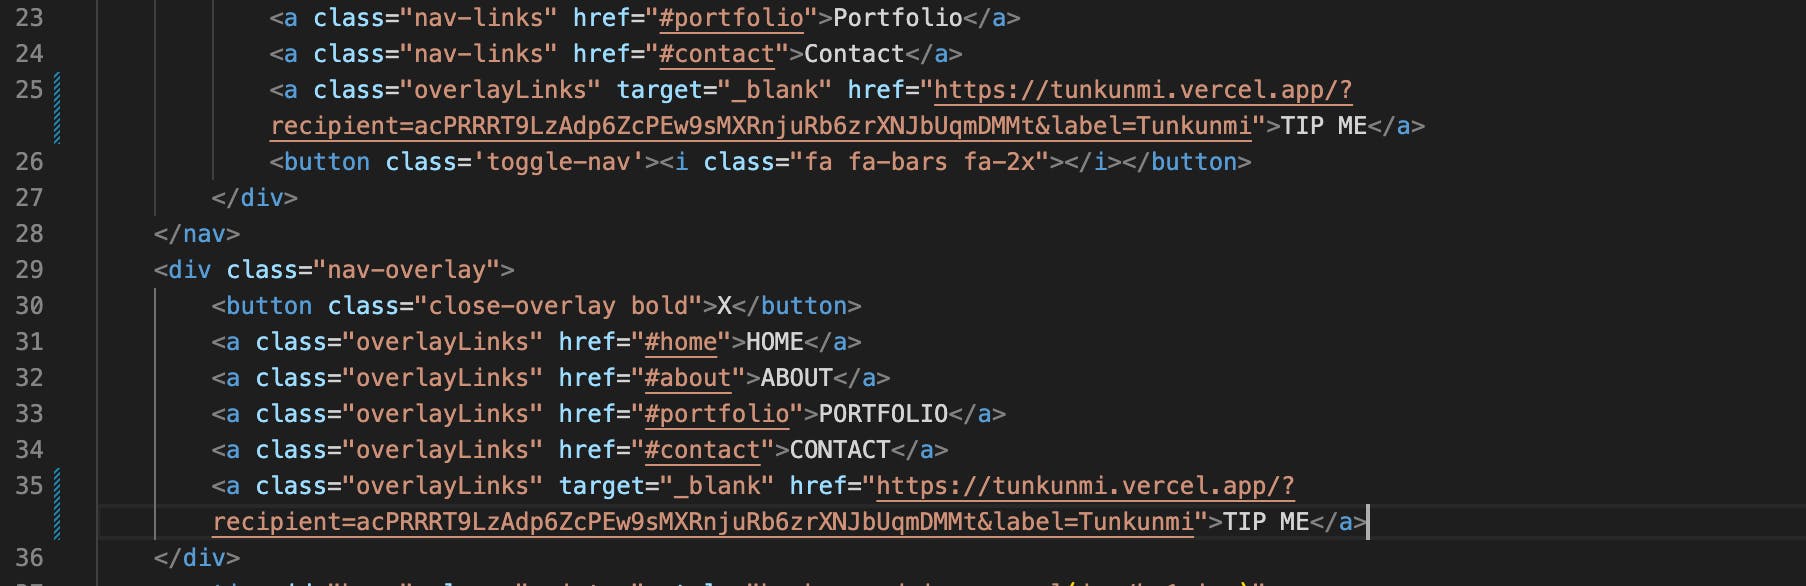
We added our payment page link to the web page in the code above. We did this by implementing an anchor tag that added our payment link as a hyperlink in a text that read “TIP ME”, considering user accessibility, we also added a target attribute that will redirect a user to the payment page link and display in a new tab when they click on “TIP ME”
Once that has been implemented, go back to your browser and refresh it, the “TIP ME” button should be evident at the top right corner of the page. Click it, you should be redirected to your Solana Pay payment page.
You can view the website here and it’s been hosted on GitHub pages.
Conclusion
In this article, we learnt how to move from the Solana Pos system from Devnet to Mainnet, how to deploy to vercel, and how to add it to their website as a payment page.
I hope you enjoyed this article. I can’t wait to see the incredible ways you experiment with this system, as it’s evident that crypto payments are becoming more popular by the day. Solutions like these will help solve many problems in the business and finance sector.